Minecraft Chunks: Understanding and Displaying
The Minecraft chunk is the fundamental unit on which the entire game operates. Terrain generation, mob spawning, crop growth, redstone functionality: everything is calculated chunk by chunk. Understanding this system and knowing how to display Minecraft chunks is essential for optimizing your constructions, farms, and server performance in 2026.
What is a chunk?
A chunk is a column of blocks measuring 16 x 16 across the entire height of the world. Since Minecraft 1.18, this height extends from Y = -64 to Y = 320, totaling 384 blocks high. Each chunk therefore contains 98,304 blocks in total (16 x 16 x 384).
The Minecraft world is divided into an infinite grid of chunks. The coordinates of a chunk are calculated by dividing the player's X and Z coordinates by 16 (rounded down). For example, a player at coordinates X = 45, Z = -20 is located in the chunk [2, -2]. On the debug screen (F3), the "Chunk" line directly displays this information.
Not all chunks are active at the same time. The game loads and simulates only the chunks located within a defined radius around each connected player. This radius depends on two distinct parameters: render distance and simulation distance. Understanding this distinction is essential for the operation of farms and redstone systems.
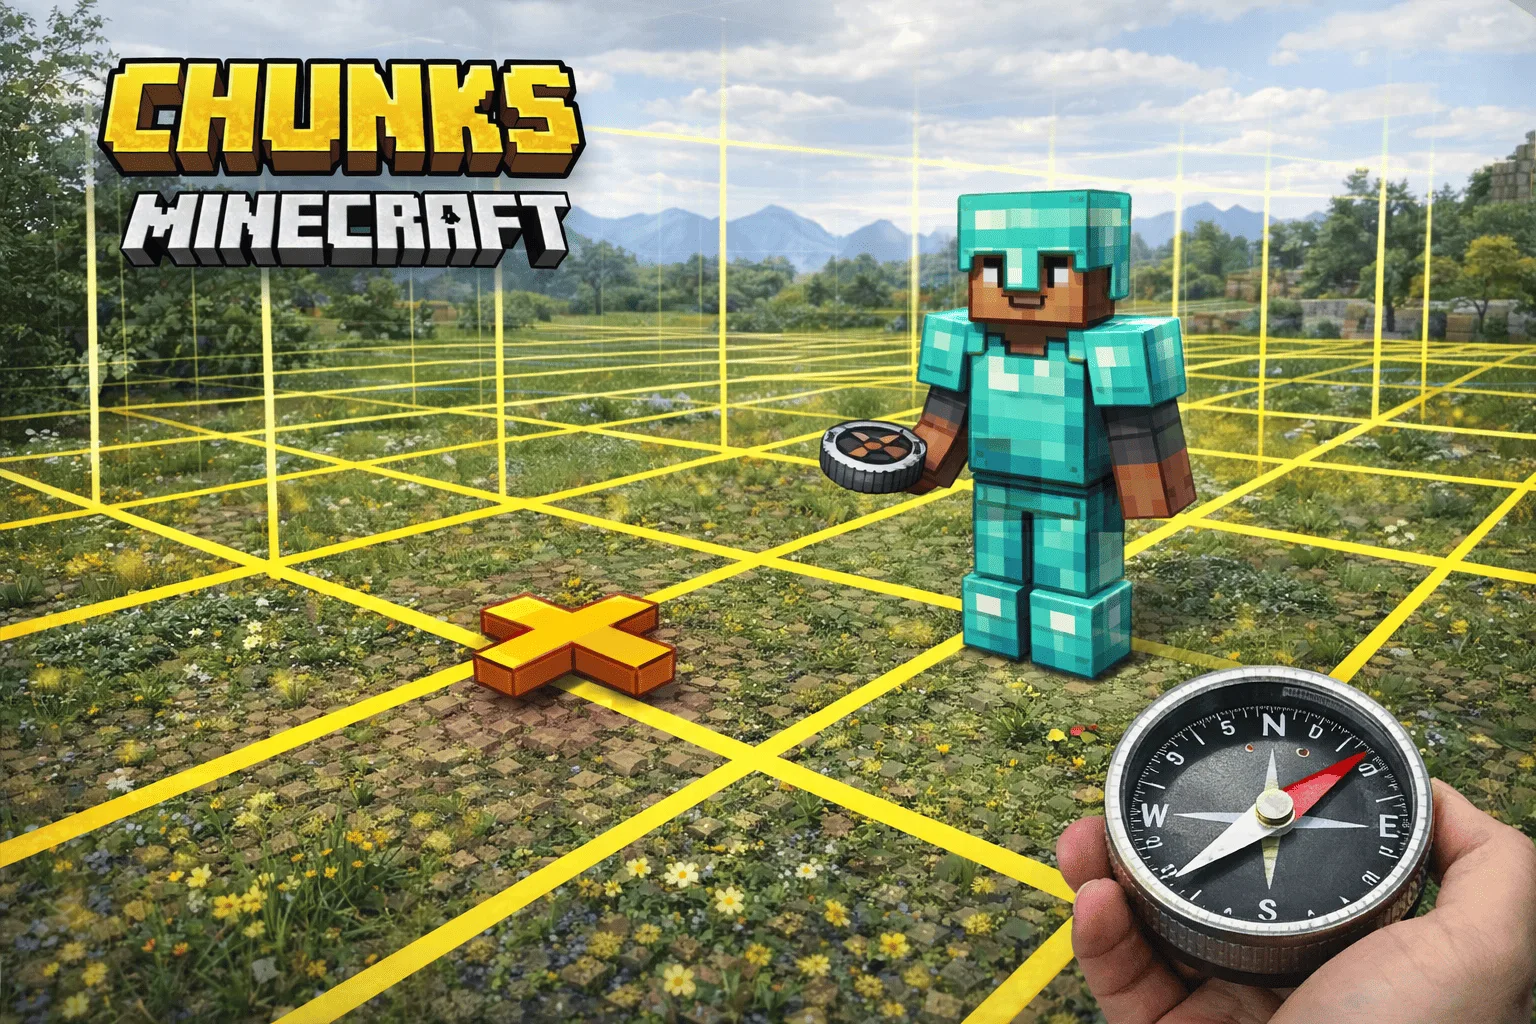
How to display borders (F3+G)
To display Minecraft chunks and precisely see the borders on the Java edition, simultaneously press F3 + G. A grid of yellow and blue lines immediately appears in the world, delineating each 16 x 16 block chunk. Yellow lines mark the horizontal borders of the chunks, and blue lines mark the vertical borders (16-block high sections). Press F3 + G again to disable the display.
On some laptop keyboards, the F3 keys are shared with system functions (volume, brightness). In this case, try Fn + F3 + G or check your keyboard settings to reverse the function key behavior.
On the Bedrock edition (console, mobile, Windows 10/11), the F3 + G shortcut does not exist. Three alternatives work: use a "chunk border" resource pack that modifies the texture of certain blocks to reveal the limits, enable coordinate display in the settings and spot multiples of 16 (when X or Z is divisible by 16, you are on a border), or install a dedicated behavior pack like Chunk Visualizer.
Knowing chunk borders is useful in several practical situations. For slime farms: slimes only spawn below Y = 40 in specific "slime chunks," and you need to know the exact chunk limits to build the farm. For redstone: some behaviors change at chunk borders, notably block update propagation. For large-scale constructions: aligning main walls on chunk borders helps anticipate loading and performance.
Loaded chunks and spawn chunks
Not all chunks behave the same way. The game distinguishes several loading levels, each with different capabilities.
Entity-ticking chunks (level 31) are the most active. They surround each player in a square whose size depends on the simulation distance. With a simulation distance of 5, this corresponds to an 11 x 11 chunk square centered on the player. In these chunks, everything works: mobs, redstone, crops, entities, gravity. These are the only chunks where your mob farms and automated systems operate normally.
Block-ticking chunks (level 32) form a one-chunk border around the entity-ticking chunks. Redstone and fluids work there, but entities (mobs, items on the ground) are not updated.
Border chunks (level 33) are the next layer. They are loaded in memory but almost nothing happens actively there.
Spawn chunks are a special case in the Java edition. A 23 x 23 chunk area centered on the world's spawn point remains loaded permanently, even without a player nearby. Spawn chunks operate at the entity-ticking level in their central part, allowing farms and redstone systems to run continuously. This is why technical players often place their most important farms (iron, automatic farming) in the spawn chunks. The /setworldspawn command allows you to move this area if necessary.
Note: The Bedrock edition does not have permanent spawn chunks. The closest equivalent is the /tickingarea command, which allows you to force the loading of specific areas, but it is limited in number and must be configured manually.
Chunks and server performance
On a multiplayer server, each connected player forces the loading of dozens of chunks around their position. With a simulation distance of 5 and 10 players scattered across the map, the server must simultaneously calculate physics, mob spawning, and block updates in hundreds of chunks. This is the main cause of TPS (ticks per second) drops on survival servers.
The server render distance (view-distance in server.properties) controls how many chunks the server sends to clients. A value of 10 means each player sees a 21 x 21 chunk square around them. Reducing this value to 6-8 significantly improves performance without greatly degrading the visual experience, especially if players can increase their client-side rendering.
The simulation distance (simulation-distance, separate since Minecraft 1.18) controls the radius in which chunks are actually active (ticking). This parameter has the most impact on performance. A value of 4 to 5 is recommended for community servers.
Pregeneration of the map eliminates one of the most common performance issues: on-the-fly chunk generation. When a player explores a never-visited area, the server must calculate the complete terrain (relief, caves, biomes, structures, ores) in real-time. Since 1.18, this operation is twice as heavy due to the doubling of the world's height. The Chunky mod allows you to pregenerate with Chunky the entire map before the server launch, eliminating these exploration freezes.
To comfortably support 10+ players with decent view distances (8-10 chunks), a server needs dedicated resources: high-frequency CPU, sufficient RAM, and SSD/NVMe storage to quickly load chunks from the disk. A professional Minecraft hosting provides these resources with the necessary stability to maintain constant 20 TPS.
FAQ Chunks
How to find a slime chunk?
Slime chunks are determined by the world's seed. Use an online tool like Chunkbase (chunkbase.com/apps/slime-finder) by entering your seed to display the map of slime chunks. Then, activate the borders with F3 + G to align your farm.
What is the difference between render distance and simulation distance?
Render distance controls the visible chunks (sent to the client for display). Simulation distance controls the active chunks (where mobs move, crops grow, redstone works). A chunk can be visible without being active.
Do spawn chunks work on Bedrock?
No. The Bedrock edition does not have permanent spawn chunks. Use the /tickingarea add command to force the loading of specific areas. The number of ticking areas is limited to 10 per world.
How many chunks does a server load per player?
With a view-distance of 10, the server loads (2 x 10 + 1)^2 = 441 chunks per player. With 10 players scattered, this can represent more than 4,000 unique chunks loaded simultaneously. That's why server performance is critical.
Can you force a chunk to load in vanilla?
Yes, with the /forceload add <x1> <z1> <x2> <z2> command in Java Edition. Forced chunks remain loaded even after disconnecting and reconnecting. In survival without commands, spawn chunks are the only area that remains loaded permanently.