Introduction to SSH Keys
SSH keys (Secure Shell) provide a much more secure method of authentication than traditional passwords. Instead of typing a password for each connection, you use a pair of cryptographic keys:
- Private Key: Stays on your local computer (never share it)
- Public Key: Installed on the VPS server
When you connect, the server checks that your private key matches the registered public key. If the match is validated, you are authenticated instantly.
Advantages of SSH Keys
| Aspect | Password | SSH Key |
|---|---|---|
| Security | Vulnerable to brute-force attacks | Almost impossible to crack |
| Convenience | Manual entry for each connection | Automatic connection |
| Sharing | Risk if disclosed | Public key shareable without risk |
| Length | Usually 8-20 characters | 2048-4096 bits of encryption |
| Automation | Difficult to script | Ideal for scripts |
🖥️ Method 1: Generate an SSH Key on Windows with PuTTY
Step 1: Download PuTTY and PuTTYgen
PuTTY is the most popular SSH client for Windows. PuTTYgen is the included key generation utility.
- Go to the official website: https://www.putty.org/
- Download the MSI installation package (64-bit or 32-bit according to your system)
- Install PuTTY - PuTTYgen will be automatically included
You can also download only puttygen.exe if you already have PuTTY.
 The downloaded puttygen.exe file
Step 2: Launch PuTTYgen
-
Open PuTTYgen via:
- Start Menu → All Programs → PuTTY → PuTTYgen
- Or double-click on
puttygen.exe
-
The key generation interface will appear:
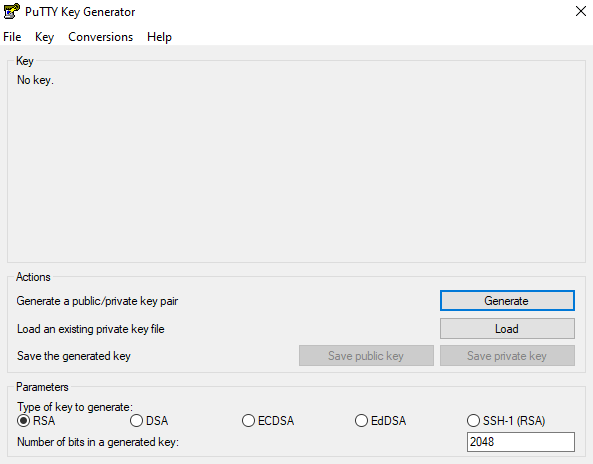 PuTTYgen main interface
Step 3: Configure the settings
Before generating the key, check the settings at the bottom of the window:
| Setting | Recommended Value | Description |
|---|---|---|
| Type of key | RSA or EdDSA (Ed25519) | Encryption algorithm |
| Number of bits | 4096 (RSA) or 256 (Ed25519) | Key length |
💡 Recommendation: For maximum security, choose RSA 4096 bits or EdDSA (Ed25519) which is more modern and efficient.
Step 4: Generate the key pair
- Click the Generate button
- Important: Move your mouse randomly in the blank area to generate entropy (cryptographic randomness)
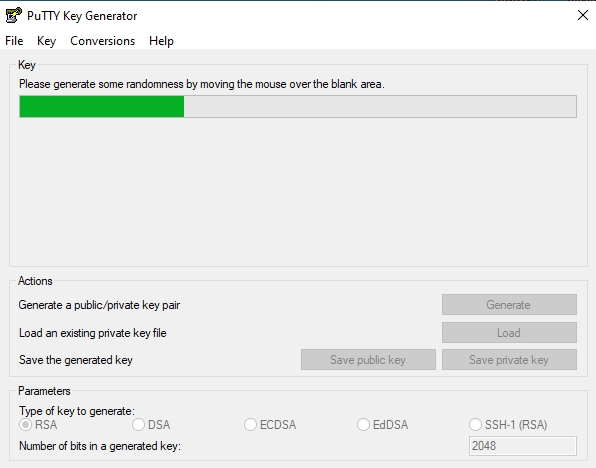 Move your mouse to generate randomness
- Wait for the progress bar to fill up
Step 5: Configure and save the keys
Once the key is generated, you will see this screen:
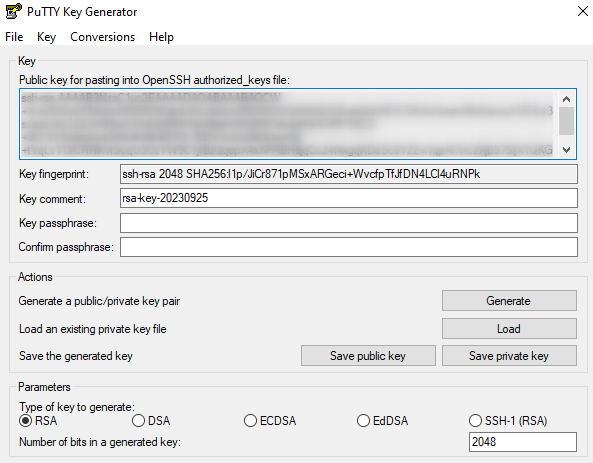 SSH Key successfully generated
Add a passphrase (recommended)
The passphrase adds an extra layer of security. Even if someone gets your private key, they cannot use it without the passphrase.
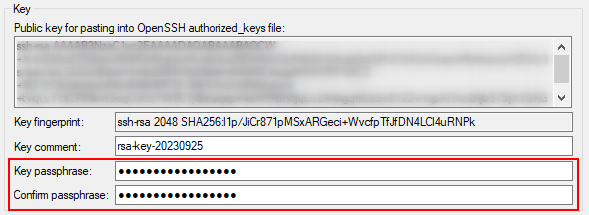 Enter the passphrase
- In Key passphrase, enter a secret phrase
- Confirm in Confirm passphrase
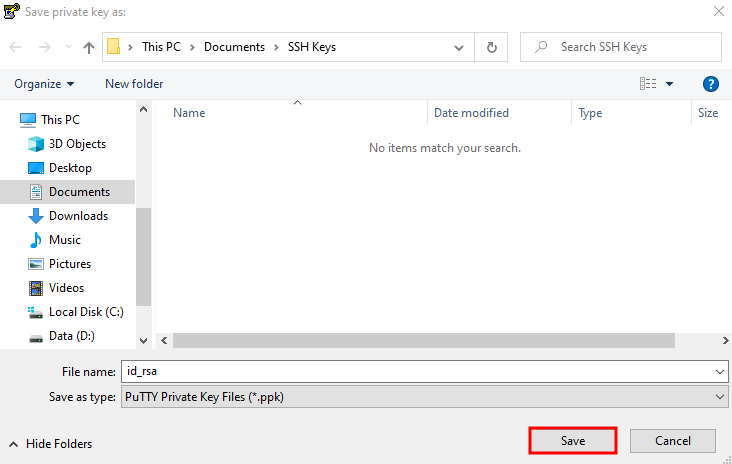
Save the private key
- Click on Save private key
- Choose a secure location
- Name the file (e.g.,
my_vps_key.ppk)
 Save private key button
 Save the .ppk file
Save the public key
- Click on Save public key
- Name the file (e.g.,
my_vps_key.pub)
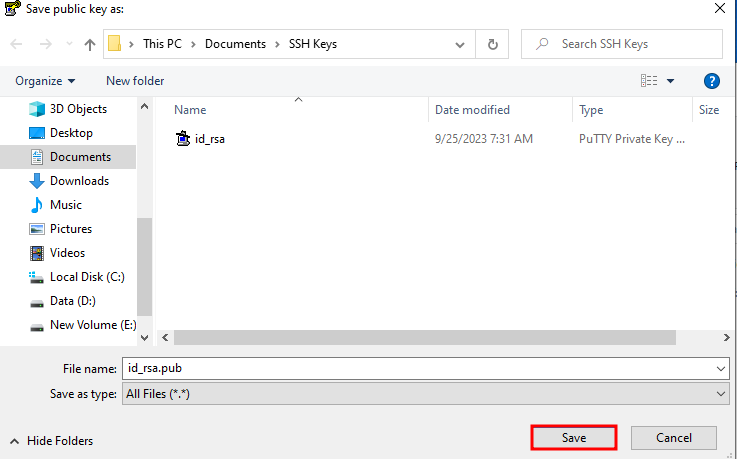 Save the public key
Copy the public key in OpenSSH format
Important: For Linux servers, you need to copy the key in OpenSSH format:
- Select all the text in the "Public key for pasting into OpenSSH authorized_keys file" area
- Copy it (Ctrl+C)
- Keep it aside for the next step
The format looks like:
ssh-rsa AAAAB3NzaC1yc2EAAAADAQABAAACAQDx... rsa-key-20241210
Step 6: Configure PuTTY to use the key
- Open PuTTY
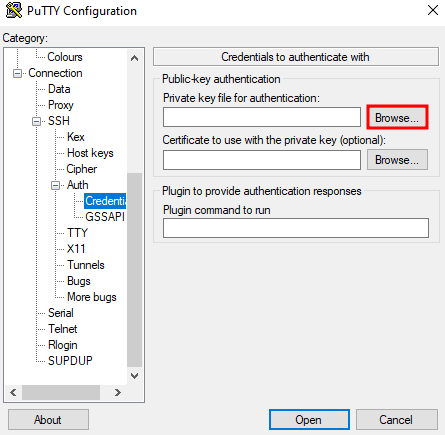
- In the left menu, navigate to: Connection → SSH → Auth → Credentials
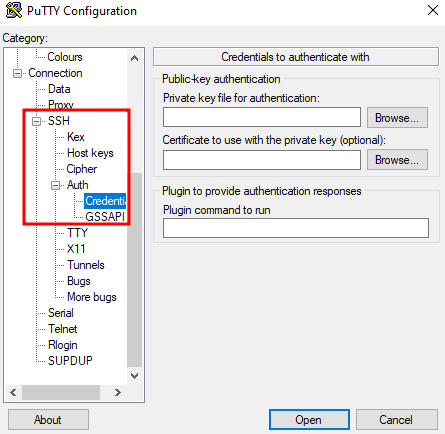 Credentials section in PuTTY
- Click on Browse next to "Private key file for authentication"
 Selecting the private key
- Select your
.ppkfile
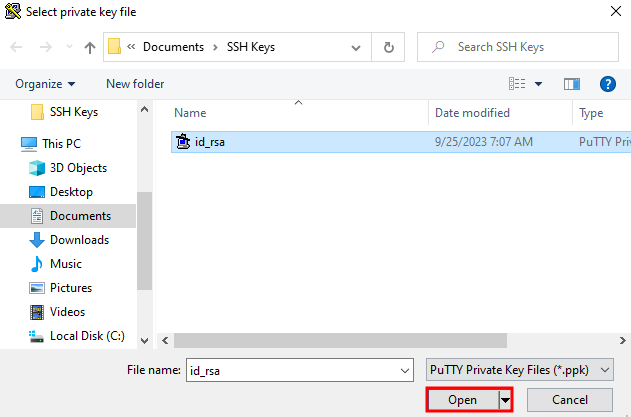 Selected .ppk file
- Go back to Session, enter your VPS IP and save the session
🐧 Method 2: Generate an SSH Key on Linux/macOS
Step 1: Open the Terminal
- Linux: Ctrl+Alt+T or search for "Terminal"
- macOS: Applications → Utilities → Terminal
Step 2: Generate the key pair
Option A: 4096-bit RSA Key (universally compatible)
ssh-keygen -t rsa -b 4096 -C "[email protected]"
Option B: Ed25519 Key (recommended, more modern)
ssh-keygen -t ed25519 -C "[email protected]"
Step 3: Follow the instructions
Generating public/private ed25519 key pair.
Enter file in which to save the key (/home/user/.ssh/id_ed25519):
- Location: Press Enter to accept the default location (
~/.ssh/id_ed25519)
Enter passphrase (empty for no passphrase):
Enter same passphrase again:
- Passphrase: Enter a secret phrase (recommended) or press Enter for none
Step 4: Verify the creation
ls -la ~/.ssh/
You should see:
id_ed25519(orid_rsa) - Private keyid_ed25519.pub(orid_rsa.pub) - Public key
Step 5: Display the public key
cat ~/.ssh/id_ed25519.pub
Result:
ssh-ed25519 AAAAC3NzaC1lZDI1NTE5AAAAI... [email protected]
Copy this entire line to install it on the server.
🚀 Install the Public Key on the VPS
Method 1: Using ssh-copy-id (Linux/macOS - Recommended)
The ssh-copy-id command automates the installation:
ssh-copy-id -i ~/.ssh/id_ed25519.pub user@VPS_IP
Example:
ssh-copy-id -i ~/.ssh/id_ed25519.pub [email protected]
You will need to enter your password one last time. Then, the key will be installed automatically.
Method 2: Manual Installation
If ssh-copy-id is not available:
Step 1: Connect to the VPS with a password
ssh root@VPS_IP
Step 2: Create the .ssh directory (if needed)
mkdir -p ~/.ssh
chmod 700 ~/.ssh
Step 3: Create/Edit the authorized_keys file
nano ~/.ssh/authorized_keys
Step 4: Paste the public key
Paste the previously copied public key (single line).
For PuTTY, it's the content from "Public key for pasting into OpenSSH authorized_keys file".
Step 5: Save and set permissions
chmod 600 ~/.ssh/authorized_keys
Step 6: Test the connection
Disconnect and reconnect:
exit
ssh root@VPS_IP
If everything works, you will be connected without a password (or with your passphrase if you have set one).
Method 3: In a single command (from your local PC)
cat ~/.ssh/id_ed25519.pub | ssh root@VPS_IP "mkdir -p ~/.ssh && chmod 700 ~/.ssh && cat >> ~/.ssh/authorized_keys && chmod 600 ~/.ssh/authorized_keys"
🔒 Secure the SSH Server
Once the SSH keys are configured, enhance security by disabling password authentication.
Step 1: Edit the SSH configuration
sudo nano /etc/ssh/sshd_config
Step 2: Modify the settings
Search for and modify these lines:
# Disable password authentication
PasswordAuthentication no

# Disable empty passwords
PermitEmptyPasswords no

# Enable public key authentication
PubkeyAuthentication yes

# Disable challenge-response authentication
ChallengeResponseAuthentication no

# Optional: Disable root login (create a sudo user first)
# PermitRootLogin no
Step 3: Restart the SSH service
sudo systemctl restart sshd
⚠️ Caution: Keep an SSH session open during testing! If the configuration is incorrect, you could lose access.
🛠️ Managing SSH Keys
Add multiple keys
You can authorize multiple keys (multiple computers, multiple users):
nano ~/.ssh/authorized_keys
Add one key per line.
Remove a key
Edit authorized_keys and delete the line corresponding to the key.
Change the passphrase of an existing key
ssh-keygen -p -f ~/.ssh/id_ed25519
Display the fingerprint of a key
ssh-keygen -lf ~/.ssh/id_ed25519.pub
🔄 Convert Key Formats
PPK to OpenSSH (PuTTY → Linux)
In PuTTYgen:
- Load your
.ppkfile with Load - Go to Conversions → Export OpenSSH key
- Save the file
OpenSSH to PPK (Linux → PuTTY)
In PuTTYgen:
- Go to Conversions → Import key
- Select your OpenSSH private key (
id_rsaorid_ed25519) - Click on Save private key
🔧 Troubleshooting
"Permission denied (publickey)"
Possible causes:
- Public key not installed on the server
- Incorrect permissions on
.sshorauthorized_keys - Incorrect private key used
Solutions:
# Check permissions (on the server)
chmod 700 ~/.ssh
chmod 600 ~/.ssh/authorized_keys

# Verify the key is in authorized_keys
cat ~/.ssh/authorized_keys
"Connection refused"
Possible causes:
- SSH service not started
- Firewall blocking port 22
Solutions:
ssh-copy-id -i ~/.ssh/id_ed25519.pub user@IP Show public key cat ~/.ssh/id_ed25519.pub Test verbose connection ssh -v user@IP Change passphrase ssh-keygen -p -f ~/.ssh/id_ed25519 View fingerprint ssh-keygen -lf ~/.ssh/id_ed25519.pub 📁 SSH Files Structure
~/.ssh/
├── authorized_keys      # Authorized public keys (on the server)
├── id_ed25519          # Ed25519 private key (on the client)
├── id_ed25519.pub      # Ed25519 public key (on the client)
├── id_rsa              # RSA private key (on the client)
├── id_rsa.pub          # RSA public key (on the client)
├── known_hosts         # Known server fingerprints
└── config              # Custom configuration (optional)
Required Permissions
| File/Folder | Permission | Command |
|---|---|---|
~/.ssh/ | 700 | chmod 700 ~/.ssh |
authorized_keys | 600 | chmod 600 ~/.ssh/authorized_keys |
| Private Key | 600 | chmod 600 ~/.ssh/id_ed25519 |
| Public Key | 644 | chmod 644 ~/.ssh/id_ed25519.pub |
💡 Best Practices
-
Use Ed25519 for new keys (more secure and efficient than RSA)
-
Always set a passphrase on your private keys
-
Never share your private key - only the public key should be copied
-
Backup your keys in a secure location (password manager, safe)
-
Use different keys for different purposes (work, personal, critical servers)
-
Disable password authentication once keys are set up
-
Regularly audit the
authorized_keysfile to remove unused keys -
Rotate your keys periodically (at least every 1-2 years)
❓ FAQ
What is the difference between RSA and Ed25519?
| Aspect | RSA | Ed25519 |
|---|---|---|
| Security | Excellent (4096 bits) | Excellent (256 bits) |
| Performance | Slower | Faster |
| Key Size | Large | Small |
| Compatibility | Universal | Very good (post-2014) |
Recommendation: Ed25519 for new deployments, RSA for compatibility with older systems.
Can I use the same key for multiple servers?
Yes, you can install the same public key on multiple servers. However, for optimal security, use different keys for critical environments.
How can I add a comment to my key?
The -C parameter allows you to add a comment:
ssh-keygen -t ed25519 -C "work-laptop-2024"
Do SSH keys expire?
No, SSH keys do not have a built-in expiration date. It is up to you to rotate them regularly.