
 Client area
This guide works on any Windows Server machine, for example an OuiHeberg Windows VPS with the license included.
Quick Summary: Operational FiveM Server in 5 Steps
Connect to your Windows Server 2019/2025 VPS via RDP
Install Visual C++ Redistributable 2019+ and 7-Zip
Download the latest FXServer artifacts from runtime.fivem.net and extract them to
C:\FXServer\serverGenerate your license key at keymaster.fivem.net, launch
FXServer.exe, configure txAdmin viahttp://localhost:40120Open ports 30120 TCP/UDP and 40120 TCP in the Windows firewall
Expect 30 to 45 minutes for a complete installation. A VPS with 4 GB of RAM minimum and Windows Server 2012 or 2025 is required.
Why Host FiveM on a Windows VPS?
FiveM runs well on both Linux and Windows, but Windows offers tangible advantages for many admins.
Advantages of Windows for a FiveM server:
Native graphical interface: txAdmin, file explorer, task manager: everything is accessible without command line
Maximum compatibility: some Lua scripts and resources are developed and tested primarily on Windows
Integrated Task Scheduler: scheduling automatic starts and backups requires no third-party tools
Facilitated debugging: logs are readable directly in the interface, without SSH or
tail -f
Recommended Specs by Server Type
Server Type | Max Players | RAM | CPU | Storage |
|---|---|---|---|---|
Test / Dev Server | 1–16 | 4 GB | 2 vCPU | 40 GB NVMe |
Light RP / DM | 16–32 | 4 GB | 2–4 vCPU | 60 GB NVMe |
Medium RP / Racing | 32–64 | 8 GB | 4 vCPU | 80 GB NVMe |
Serious RP / ESX/QBCore | 64–128 | 16 GB | 6–8 vCPU | 120 GB NVMe |
High Density Server | 128–256 | 32 GB | 8+ vCPU | 200 GB NVMe |
OuiHeberg offers Windows VPS on NVMe with Anti-DDoS included and deployment in under 2 minutes: ideal for launching a FiveM server without delay.
Prerequisites
Before you begin, make sure you have:
A VPS running Windows Server 2019 or 2022 (Windows Server 2016 works but is no longer recommended)
A free CFX.re account: created at portal.cfx.re
The following ports available:
30120 TCP/UDP: player connections40120 TCP: txAdmin web interface
Step 1: Connect to the VPS via Remote Desktop (RDP)
Open Remote Desktop Connection (mstsc) on your PC, enter the IP of your VPS, then connect using the credentials provided by your host.
Once connected, quickly check the available resources:
# In PowerShell: check available RAM
Get-CimInstance Win32_OperatingSystem | Select-Object TotalVisibleMemorySize, FreePhysicalMemory

# Check disk space
Get-PSDrive C | Select-Object Used, Free
If you have never configured RDP on a Windows VPS, the official Microsoft documentation details the complete procedure.
Step 2: Install System Prerequisites
FXServer requires two dependencies: Visual C++ Redistributable 2019+ and 7-Zip to extract .7z archives.
Manual Installation
Visual C++ 2015-2022 x64: Download from Microsoft
7-Zip: Download from 7-zip.org
Automated Installation in PowerShell (recommended)
Run PowerShell as administrator and execute this script:
# Create the download folder
New-Item -ItemType Directory -Force -Path "C:\FXServer\downloads"

# Download Visual C++ Redistributable 2022 x64
$vcUrl = "https://aka.ms/vs/17/release/vc_redist.x64.exe"
$vcPath = "C:\FXServer\downloads\vc_redist.x64.exe"
Invoke-WebRequest -Uri $vcUrl -OutFile $vcPath
Start-Process -FilePath $vcPath -ArgumentList "/quiet /norestart" -Wait
Write-Host "Visual C++ installed." -ForegroundColor Green

# Download and install 7-Zip
$7zUrl = "https://www.7-zip.org/a/7z2408-x64.exe"
$7zPath = "C:\FXServer\downloads\7zip.exe"
Invoke-WebRequest -Uri $7zUrl -OutFile $7zPath
Start-Process -FilePath $7zPath -ArgumentList "/S" -Wait
Write-Host "7-Zip installed." -ForegroundColor Green
Note: Check the version of 7-Zip at 7-zip.org before executing: the version number in the URL changes with each release.
Step 3: Download and Configure FXServer
Recommended Folder Structure
C:\FXServer\
├── server\          ← FXServer binaries (FXServer.exe, etc.)
└── server-data\     ← data, resources, server.cfg
    └── resources\
        └── [categories]\
Complete PowerShell Script: Automatic Download and Extraction
# Create the folder structure
New-Item -ItemType Directory -Force -Path "C:\FXServer\server"
New-Item -ItemType Directory -Force -Path "C:\FXServer\server-data\resources"

# Download the latest FXServer artifacts (recommended build)
# Check the exact URL of the latest build at:
# https://runtime.fivem.net/artifacts/fivem/build_server_windows/master/
$artifactUrl = "https://runtime.fivem.net/artifacts/fivem/build_server_windows/master/RECOMMENDED_NUMBER/server.7z"
# Replace RECOMMENDED_NUMBER with the number displayed on the artifacts page

$downloadPath = "C:\FXServer\downloads\server.7z"
Write-Host "Downloading FXServer artifacts..." -ForegroundColor Cyan
Invoke-WebRequest -Uri $artifactUrl -OutFile $downloadPath

# Extract with 7-Zip
$7zExe = "C:\Program Files\7-Zip\7z.exe"
& $7zExe x $downloadPath -o"C:\FXServer\server" -y
Write-Host "FXServer extracted to C:\FXServer\server" -ForegroundColor Green
Important: First go to runtime.fivem.net/artifacts/fivem/build_server_windows/master/ to copy the URL of the latest recommended build (marked "RECOMMENDED"). The build number changes regularly.
Step 4: Generate the CFX.re License Key
Without a valid license key, FXServer refuses to start.
Steps:
Log in to keymaster.fivem.net with your CFX.re account
Click on "Generate Key"
Enter your server name and the IP of your VPS
Copy the generated key (format
cfxk_xxxxxxxxxxxx_xxxxxx)
The key should be placed in server.cfg with this exact syntax:
sv_licenseKey "cfxk_xxxxxxxxxxxx_xxxxxx"
Never share your license key. It is linked to your CFX.re account and the IP of your server.
Step 5: Configure the Windows Firewall
Run PowerShell as administrator and execute these commands:
# Open port 30120 TCP (player connections)
New-NetFirewallRule -DisplayName "FiveM - TCP 30120" `
    -Direction Inbound -Protocol TCP -LocalPort 30120 `
    -Action Allow -Profile Any

# Open port 30120 UDP (player connections)
New-NetFirewallRule -DisplayName "FiveM - UDP 30120" `
    -Direction Inbound -Protocol UDP -LocalPort 30120 `
    -Action Allow -Profile Any

# Open port 40120 TCP (txAdmin)
New-NetFirewallRule -DisplayName "FiveM - txAdmin 40120" `
    -Direction Inbound -Protocol TCP -LocalPort 40120 `
    -Action Allow -Profile Any

Write-Host "FiveM ports successfully opened." -ForegroundColor Green
Check that the ports are listening
After starting FXServer, check with:
netstat -an | findstr "30120\|40120"
You should see LISTENING on both ports.
OuiHeberg's Anti-DDoS filters malicious traffic upstream: legitimate ports pass without additional configuration.
Step 6: First Start and txAdmin Configuration
Launch FXServer
Double-click on C:\FXServer\server\FXServer.exe: or launch it in PowerShell:
Start-Process -FilePath "C:\FXServer\server\FXServer.exe" -WorkingDirectory "C:\FXServer\server-data"
A console window opens and your browser automatically launches at http://localhost:40120.
Initial txAdmin Configuration
Link your CFX.re account: click "Link Account", log in to cfx.re, authorize access
Create an admin password for the txAdmin interface
Name your server
Choose a recipe (see table below)
Enter your CFX.re license key
Click "Run Recipe" then "Save & Run Server"
Which recipe to choose? QBCore vs ESX vs Vanilla
Recipe | Usage | Complexity | Database |
|---|---|---|---|
CFX Default (Vanilla) | Test, demo, simple server | ⭐ Easy | Not required |
ESX Legacy | Classic RP, large community of scripts | ⭐⭐ Medium | MySQL required |
QBCore Framework | Modern RP, active scripts, frequent updates | ⭐⭐ Medium | MySQL required |
To get started, choose CFX Default: you can migrate to ESX or QBCore once the server is stable.
Step 7: Optimize server.cfg for Performance
This is where most guides stop. Here’s what really makes a difference.
Critical Settings by Number of Players
Players |
|
| OneSync | Recommended RAM |
|---|---|---|---|---|
1–32 | 32 | false | Legacy | 4 GB |
33–64 | 64 | true | Infinity | 8 GB |
65–128 | 128 | true | Infinity | 16 GB |
128+ | 256 | true | Infinity | 32 GB |
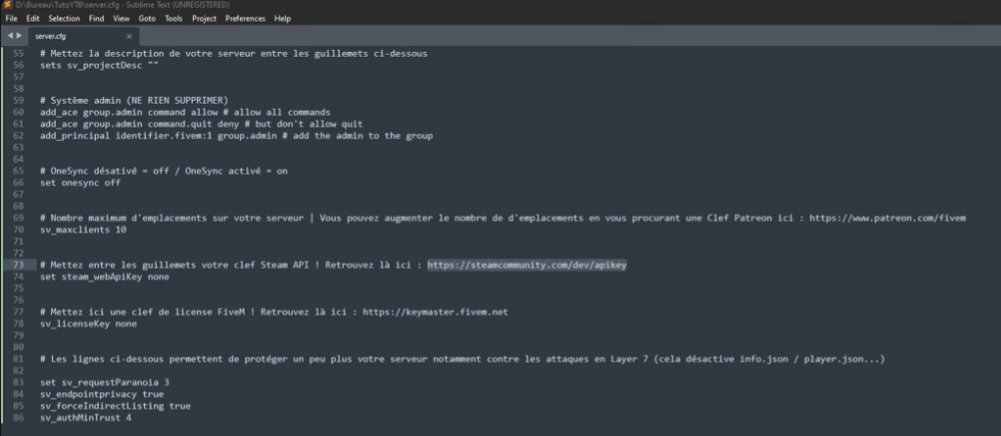
Optimized server.cfg: complete template
# ============================================
# FIVE M SERVER CONFIGURATION: OuiHeberg 2026
# ============================================

# Server identity
sv_licenseKey "cfxk_YOUR_KEY_HERE"
sets sv_projectName "My FiveM Server"
sets sv_projectDesc "FiveM server hosted on OuiHeberg"
sets sv_tags "roleplay, fivem, vps"

# Slots and access
sv_maxclients 64
sv_endpointPrivacy true

# OneSync: Infinity for 33+ players, Legacy for less than 32
set onesync on

# Security
sv_scriptHookAllowed 0
sv_entityLockdown strict
sv_duplicatePlayers true

# Target GTA V build (check the current value on docs.fivem.net)
sv_enforceGameBuild 3258

# Network
set sv_hostname "My FiveM Server | ouiheberg.com"
set sv_licenseKeyToken ""

# Essential resources only
ensure mapmanager
ensure chat
ensure spawnmanager
ensure sessionmanager
ensure hardcap
ensure baseevents

# Add your resources here with 'ensure'
# ensure es_extended
# ensure qb-core
 OneSync: Legacy or Infinity?
OneSync Legacy: up to 32 players, classic synchronization, less CPU intensive
OneSync Infinity: 33 players and more, extended synchronization, requires more RAM and CPU
Activate Infinity with set onesync on in server.cfg. For Legacy: set onesync legacy.
Disable Unused Resources
Each ensure loads a resource into memory. Comment out or remove anything your server does not use:
# ensure unused_resource ← comment with #
A well-optimized ESX server with 50 active resources consumes about 3–4 GB of RAM. With 150 poorly sorted resources, you can easily exceed 12 GB.
Step 8: Manage Resources and Mods
Resource Structure
C:\FXServer\server-data\resources\
├── [core]\
│   ├── es_extended\
│   └── qb-core\
├── [scripts]\
│   ├── esx_jobs\
│   └── qb-policejob\
└── [maps]\
    └── custom_map\
The brackets in folder names ([core], [scripts]) are categories: FiveM ignores them but they help with organization.
Install ESX Legacy or QBCore via txAdmin
The simplest method: use the Recipe Deployer from txAdmin (Step 6). It automatically downloads and configures the framework, dependencies, and database.
Add a Resource Manually
Example with es_extended:
Download the resource from GitHub
Extract it to
C:\FXServer\server-data\resources\[core]\es_extended\Check that the folder contains a
fxmanifest.luafile (or__resource.luafor older resources)Add in
server.cfg:
ensure es_extended
ensure vs start: what’s the difference?
Command | Behavior |
|---|---|
| Starts the resource and restarts it if it crashes: recommended |
| Starts only once at server launch |
Always use ensure for your production resources.
Update a Resource Without Restarting the Server
In txAdmin → Resources → find the resource → click Restart. Or via the console:
restart resource_name
Step 9: Automate Startup with Task Scheduler
Without this step, your FiveM server will not restart after a VPS reboot.
Create the Scheduled Task in PowerShell
# Parameters
$taskName    = "FiveM - FXServer AutoStart"
$fxExe       = "C:\FXServer\server\FXServer.exe"
$workingDir  = "C:\FXServer\server-data"
$logFile     = "C:\FXServer\logs\fxserver_startup.log"

# Create the logs folder
New-Item -ItemType Directory -Force -Path "C:\FXServer\logs"

# Define the action
$action = New-ScheduledTaskAction `
    -Execute $fxExe `
    -WorkingDirectory $workingDir

# Trigger: at system startup (with a delay of 30s)
$trigger = New-ScheduledTaskTrigger -AtStartup
$trigger.Delay = "PT30S"

# Settings: run with highest privileges, even if not logged in
$settings = New-ScheduledTaskSettingsSet `
    -ExecutionTimeLimit (New-TimeSpan -Hours 0) `
    -RestartCount 3 `
    -RestartInterval (New-TimeSpan -Minutes 1)

$principal = New-ScheduledTaskPrincipal `
    -UserId "SYSTEM" `
    -LogonType ServiceAccount `
    -RunLevel Highest

# Register the task
Register-ScheduledTask `
    -TaskName $taskName `
    -Action $action `
    -Trigger $trigger `
    -Settings $settings `
    -Principal $principal `
    -Force

Write-Host "Scheduled task created: $taskName" -ForegroundColor Green
Check that the task works
# List FiveM tasks
Get-ScheduledTask | Where-Object { $_.TaskName -like "*FiveM*" }

# Force execution to test
Start-ScheduledTask -TaskName "FiveM - FXServer AutoStart"
Step 10: Automated Backups
Losing data from a FiveM server (characters, vehicles, houses) is catastrophic. This script backs everything up automatically.
What to back up
C:\FXServer\server-data\: resources, configs, server.cfgYour MySQL database (if you are using ESX or QBCore)
PowerShell backup script with 7-day rotation
# ============================================
# FIVE M BACKUP SCRIPT: 7-day Rotation
# ============================================

$sourceDir   = "C:\FXServer\server-data"
$backupRoot  = "C:\FXServer\backups"
$retentionDays = 7
$date        = Get-Date -Format "yyyy-MM-dd_HH-mm"
$backupPath  = "$backupRoot\backup_$date"

# Create the backup folder
New-Item -ItemType Directory -Force -Path $backupPath

# Copy server data
Write-Host "Backing up server-data..." -ForegroundColor Cyan
Copy-Item -Path $sourceDir -Destination "$backupPath\server-data" -Recurse -Force

# MySQL backup (if MariaDB/MySQL installed)
# Replace the values with your credentials
$mysqlUser   = "root"
$mysqlPass   = "YOUR_PASSWORD"
$mysqlDb     = "essentialmode"  # or qbcore, fivem, etc.
$mysqldump   = "C:\xampp\mysql\bin\mysqldump.exe"

if (Test-Path $mysqldump) {
    Write-Host "Backing up MySQL database..." -ForegroundColor Cyan
    & $mysqldump -u $mysqlUser -p$mysqlPass $mysqlDb | Out-File "$backupPath\database_$date.sql"
    Write-Host "Database backed up." -ForegroundColor Green
}

# Compress the backup
$7zExe = "C:\Program Files\7-Zip\7z.exe"
& $7zExe a "$backupRoot\backup_$date.7z" "$backupPath\*" -mx=5
Remove-Item -Path $backupPath -Recurse -Force

Write-Host "Compressed backup: backup_$date.7z" -ForegroundColor Green

# Rotation: delete backups older than 7 days
$cutoffDate = (Get-Date).AddDays(-$retentionDays)
Get-ChildItem -Path $backupRoot -Filter "backup_*.7z" |
    Where-Object { $_.LastWriteTime -lt $cutoffDate } |
    Remove-Item -Force

Write-Host "Rotation completed. Backups retained: $retentionDays days." -ForegroundColor Green
Schedule daily backup at 4 AM
$backupScript = "C:\FXServer\scripts\backup.ps1"
New-Item -ItemType Directory -Force -Path "C:\FXServer\scripts"

# Back up the above script in $backupScript, then:
$action  = New-ScheduledTaskAction -Execute "powershell.exe" `
           -Argument "-NonInteractive -File `"$backupScript`""
$trigger = New-ScheduledTaskTrigger -Daily -At "04:00"
$principal = New-ScheduledTaskPrincipal -UserId "SYSTEM" -LogonType ServiceAccount -RunLevel Highest

Register-ScheduledTask -TaskName "FiveM - Daily Backup" `
    -Action $action -Trigger $trigger -Principal $principal -Force

Write-Host "Automatic backup scheduled at 4:00 AM." -ForegroundColor Green
Test the restoration
# Extract a backup to check its integrity
$7zExe = "C:\Program Files\7-Zip\7z.exe"
& $7zExe t "C:\FXServer\backups\backup_2026-01-15_04-00.7z"
Step 11: Monitoring and Automatic Restart
txAdmin already monitors FXServer, but an external watchdog adds a layer of protection: especially for crashes that block txAdmin itself.
PowerShell watchdog script with Discord alerts
# ============================================
# FXSERVER WATCHDOG: Auto Restart + Discord
# ============================================
# Save this script in C:\FXServer\scripts\watchdog.ps1

$fxExe       = "C:\FXServer\server\FXServer.exe"
$workingDir  = "C:\FXServer\server-data"
$webhookUrl  = "https://discord.com/api/webhooks/YOUR_WEBHOOK_HERE"
$logFile     = "C:\FXServer\logs\watchdog.log"
$restartDelay = 15  # seconds before restart

function Write-Log {
    param([string]$Message)
    $timestamp = Get-Date -Format "yyyy-MM-dd HH:mm:ss"
    "$timestamp - $Message" | Out-File -FilePath $logFile -Append
    Write-Host "$timestamp - $Message"
}

function Send-DiscordAlert {
    param([string]$Title, [string]$Message, [int]$Color = 15158332)
    try {
        $payload = @{
            embeds = @(@{
                title       = $Title
                description = $Message
                color       = $Color
                timestamp   = (Get-Date).ToString("o")
            })
        } | ConvertTo-Json -Depth 8
        Invoke-RestMethod -Uri $webhookUrl -Method Post `
            -ContentType "application/json" -Body $payload
    } catch {
        Write-Log "Discord webhook error: $($_.Exception.Message)"
    }
}

Write-Log "Watchdog started."
Send-DiscordAlert -Title "🟢 FiveM Watchdog" -Message "Monitoring of FXServer activated." -Color 3066993

while ($true) {
    $process = Get-Process -Name "FXServer" -ErrorAction SilentlyContinue

    if (-not $process) {
        Write-Log "FXServer not detected: restarting..."
        Send-DiscordAlert -Title "🔴 FXServer Crash detected" `
            -Message "FXServer is not responding. Restarting in $restartDelay seconds..." `
            -Color 15158332

        Start-Sleep -Seconds $restartDelay

        Start-Process -FilePath $fxExe -WorkingDirectory $workingDir
        Write-Log "FXServer restarted."
        Send-DiscordAlert -Title "🟡 FXServer Restarted" `
            -Message "FXServer has been automatically relaunched." -Color 15844367

        Start-Sleep -Seconds 60  # Wait for the server to start before re-checking
    }

    Start-Sleep -Seconds 30  # Check every 30 seconds
}
Schedule the watchdog at system startup
$watchdogScript = "C:\FXServer\scripts\watchdog.ps1"

$action = New-ScheduledTaskAction -Execute "powershell.exe" `
    -Argument "-NonInteractive -WindowStyle Hidden -File `"$watchdogScript`""
$trigger = New-ScheduledTaskTrigger -AtStartup
$trigger.Delay = "PT60S"  # Starts 60s after boot (lets FXServer start first)
$principal = New-ScheduledTaskPrincipal -UserId "SYSTEM" -LogonType ServiceAccount -RunLevel Highest
$settings = New-ScheduledTaskSettingsSet -ExecutionTimeLimit (New-TimeSpan -Hours 0)

Register-ScheduledTask -TaskName "FiveM - Watchdog" `
    -Action $action -Trigger $trigger -Principal $principal -Settings $settings -Force

Write-Host "Watchdog scheduled at startup." -ForegroundColor Green
Note txAdmin: txAdmin integrates its own monitoring system. This external watchdog is complementary: it monitors the FXServer process itself, not just the game server status.
Monitor txAdmin logs
The txAdmin logs are located in:
C:\FXServer\server-data\txData\[server-name]\logs\
Check fxserver.log for crashes and txadmin.log for administration errors.
Troubleshooting: 7 common errors
Error | Probable Cause | Solution |
|---|---|---|
| Key misplaced or incorrect syntax | Check |
Server invisible in the FiveM list | Ports not open or incorrect IP in Keymaster | Check firewall + |
txAdmin inaccessible (port 40120) | Firewall blocks the port | Run the PowerShell rule for port 40120 TCP |
Crash on FXServer startup | Missing or corrupted Visual C++ | Reinstall VC++ 2019/2022 x64 from Microsoft |
| Directive missing from server.cfg | Add |
Saturated RAM, slow server | Too many resources active simultaneously | Disable unnecessary resources, consider a VPS upgrade |
Players cannot connect | Anti-DDoS or firewall blocks | Check Windows inbound rules + contact hosting support |
Recommended video tutorials
💡 Do you prefer to learn by video? These YouTube tutorials complement this guide with a step-by-step visual demonstration.
Create a FiveM server on Windows: Complete installation of FXServer on Windows, from A to Z
Create a FiveM server on a VPS | Tutorial 2024: Specific VPS configuration, ports, txAdmin, and first startup
FiveM VPS Windows Tutorial: Complete setup on a Windows VPS with live demonstration
FAQ
What is the difference between FiveM and RedM?
FiveM is a multiplayer client for GTA V (Los Santos). RedM is its equivalent for Red Dead Redemption 2 (Blackwater, Saint Denis). Both run on the CFX.re platform and use FXServer, but the resources, scripts, and frameworks are incompatible with each other.
How many players can we have on an 8 GB RAM VPS?
With 8 GB of RAM and a good CPU (4 vCPU), you can comfortably host 32 to 64 players with a well-optimized ESX or QBCore framework. Beyond 64 slots, crashes and latency increase if resources are not sorted. OneSync Infinity is required from 33 players.
Is it free to host FiveM?
FiveM itself is free: FXServer, txAdmin, and the CFX.re license key cost nothing. You only pay for VPS hosting. Some premium frameworks (Patreon ESX, paid scripts) have their own costs, but the core of FiveM is open source.
Can we migrate an existing FiveM server to a new VPS?
Yes. The migration is done in 3 steps: 1) back up server-data/ + the MySQL database, 2) install FXServer on the new VPS according to this guide, 3) restore the files and the database. Remember to update the IP in Keymaster after migration.
Do we need a Windows or Linux VPS for FiveM?
Both work. Windows is recommended if you are a beginner: the graphical interface, txAdmin, and Task Scheduler are more accessible. Linux is often preferred in advanced production for its lightweight and reduced RAM consumption (~500 MB less). For a first FiveM server, Windows is the simplest choice.
How to update FXServer without losing data?
Download the new build from runtime.fivem.net/artifacts
Stop FXServer via txAdmin
Replace the files in
C:\FXServer\server\with the new ones (without touchingserver-data\)Restart FXServer
Your resources, configs, and data are in server-data\: they are never overwritten by a binary update.
Useful resources
Prefer a managed option over administering a VPS yourself? Check out the managed OuiHeberg FiveM server, txAdmin and anti-DDoS included.