🔄 Set up Dynamic DNS (DDNS) on cPanel
OuiHeberg - Technical Documentation
Complete guide to set up and use Dynamic DNS
What is Dynamic DNS?
Dynamic DNS (DDNS or Dynamic Domain Name System) is a system that automatically updates DNS records when your IP address changes.
Why do you need it?
Most residential and business Internet connections use dynamic IP addresses: your ISP assigns you a new IP address regularly. This poses a problem if you want to:
- Host a server at home (file server, NAS, surveillance cameras)
- Access your home network remotely
- Host web services from your personal connection
- Use home automation applications accessible from outside
Without DDNS, each IP change would cause your domain to point to an outdated address, leading to connection failures.
How does DDNS work?
The principle is simple: your router detects an IP address change, contacts a special URL (called webcall) provided by cPanel, and cPanel automatically updates the DNS records of your domain with the new IP address.
Access the Dynamic DNS interface
Step 1: Log in to cPanel
- Log in to your OuiHeberg client area
- Access your hosting and click on Access cPanel
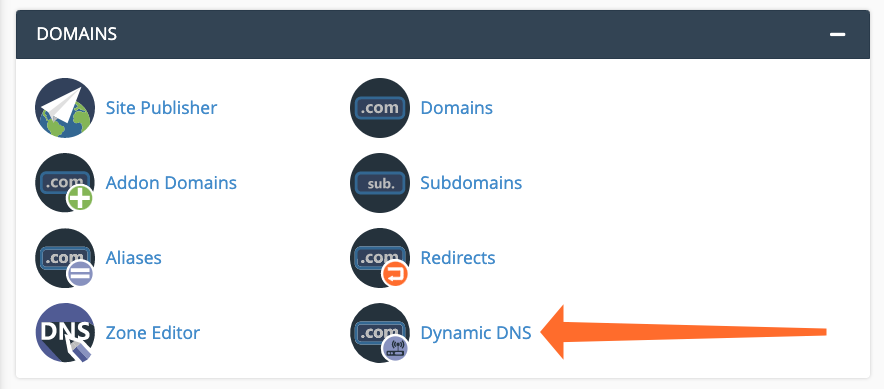
Step 2: Open Dynamic DNS
- In cPanel, look for the Domains section
- Click on Dynamic DNS
💡 Tip: Use the search bar at the top of cPanel and type "Dynamic" to quickly find the tool.
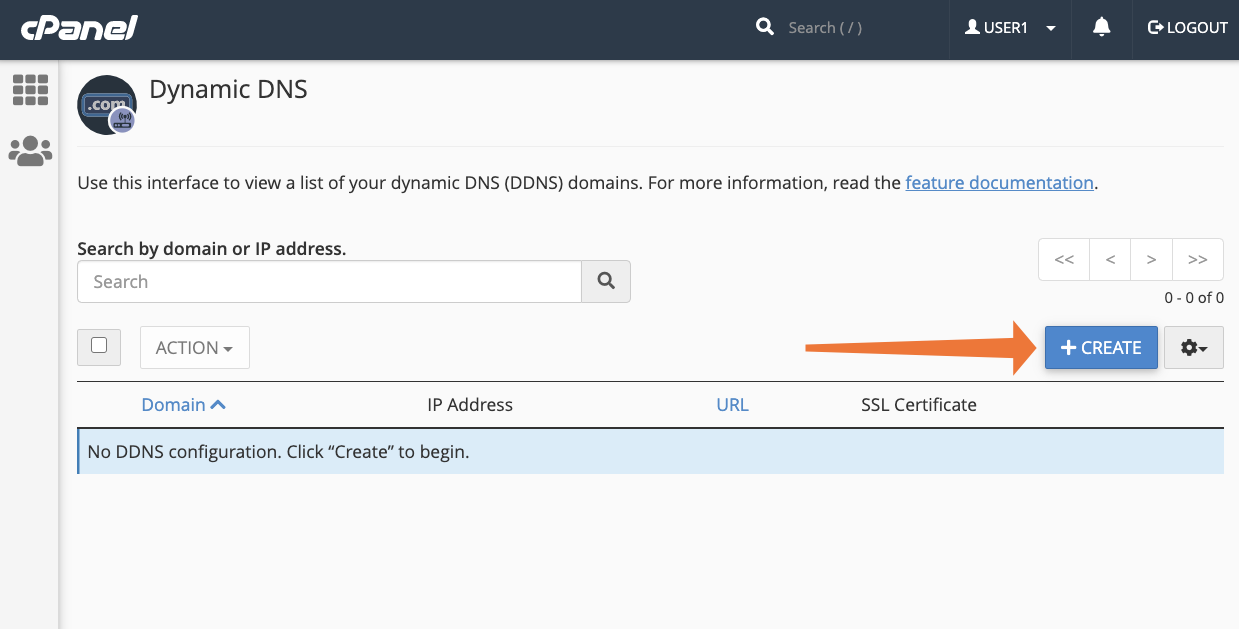
Create a DDNS domain
Step 1: Start the creation
In the Dynamic DNS interface, click on the Create button.
Step 2: Configure the subdomain
Fill out the creation form:
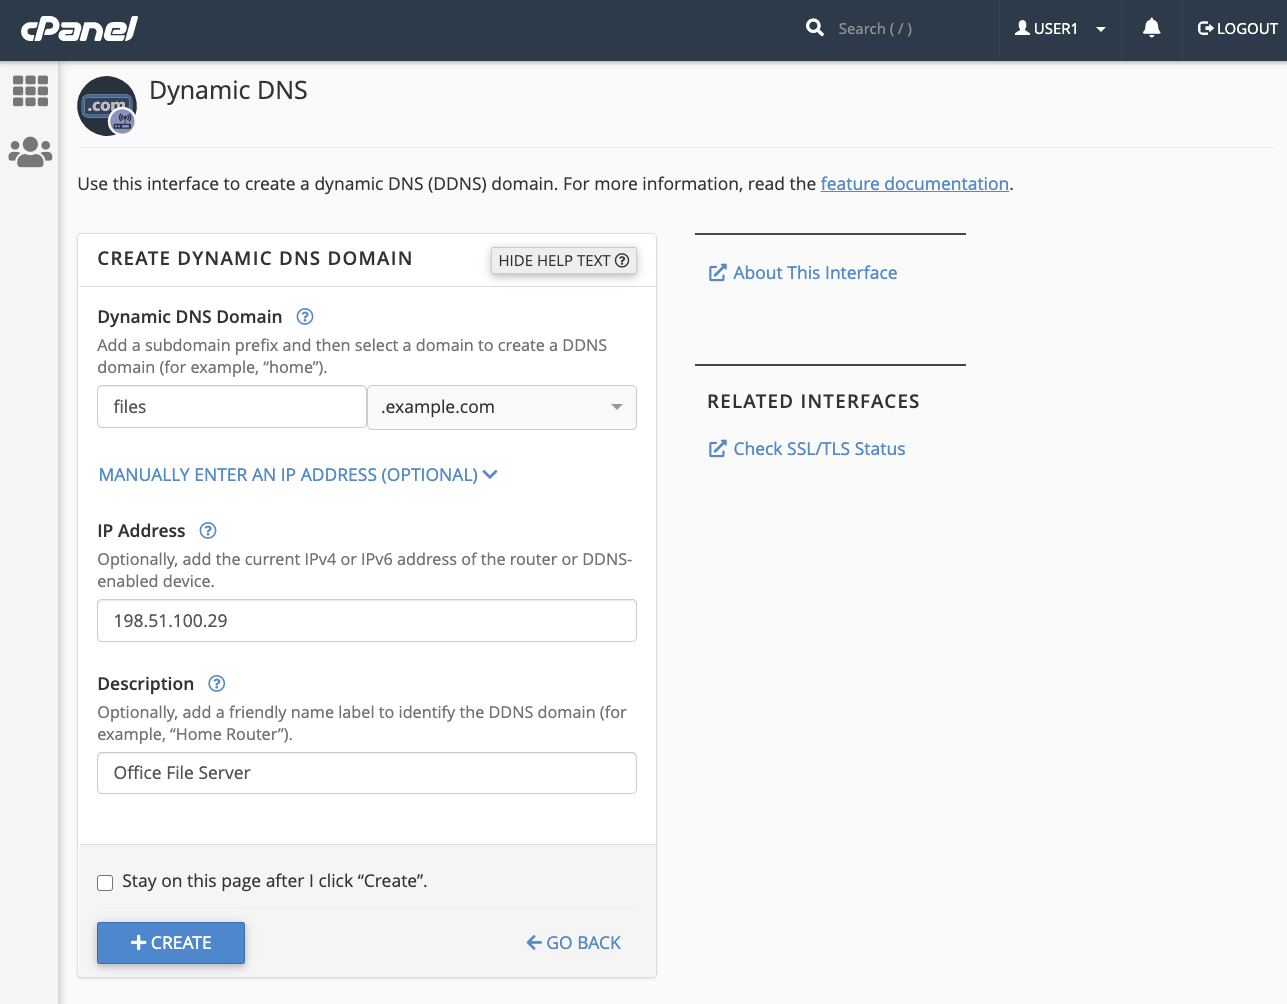
| Field | Description | Example |
|---|---|---|
| Dynamic DNS Domain | The subdomain to create | home |
| Domain | Select your main domain | mysite.com |
| IP Address | The current IP address (optional) | 86.123.45.67 |
| Description | A description to identify this DDNS | Home server |
Useful subdomain examples:
| Subdomain | Usage |
|---|---|
home or maison | Access to your home network |
nas | Access to your NAS server |
cam or cameras | Access to your surveillance cameras |
office or bureau | Access to your professional network |
files or fichiers | File server |
vpn | VPN access point |
Step 3: Validate the creation
Click on Create to create the DDNS domain.
cPanel then generates a unique webcall URL:
⚠️ Important: The webcall URL is like a password. Never share it publicly! Anyone with this URL can modify your domain's IP address.
Understanding the Dynamic DNS interface
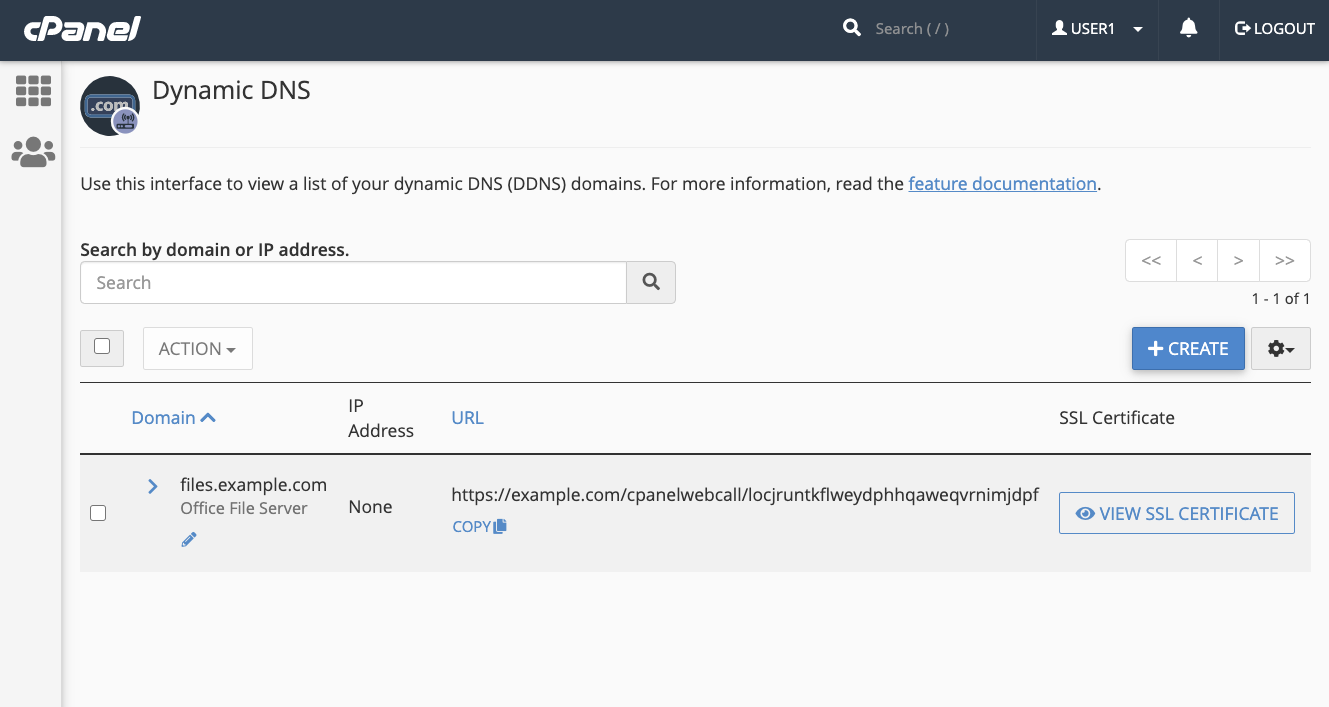
Once your DDNS domain is created, the interface displays a table with the following information:
| Column | Description |
|---|---|
| Domain | The full DDNS domain name (e.g., home.mysite.com) |
| IP Address | The current IPv4 or IPv6 address |
| URL | The webcall URL to use for updates |
| SSL Certificate | The SSL certificate for secure connections |
Detailed information of a domain
By clicking on a domain, you can see:
- Description: Modify the domain's description
- Last Update Time: Last time the IP changed
- Last Run Time: Last update attempt
Configure your router
Retrieve necessary information
Before configuring your router, note the following information from cPanel:
Webcall URL: https://mysite.com/cpanelwebcall/xxxxxxxxxxxxxxxxxxxxx
Retrieve the SSL certificate (recommended)
For a secure connection, click on View SSL Certificate:
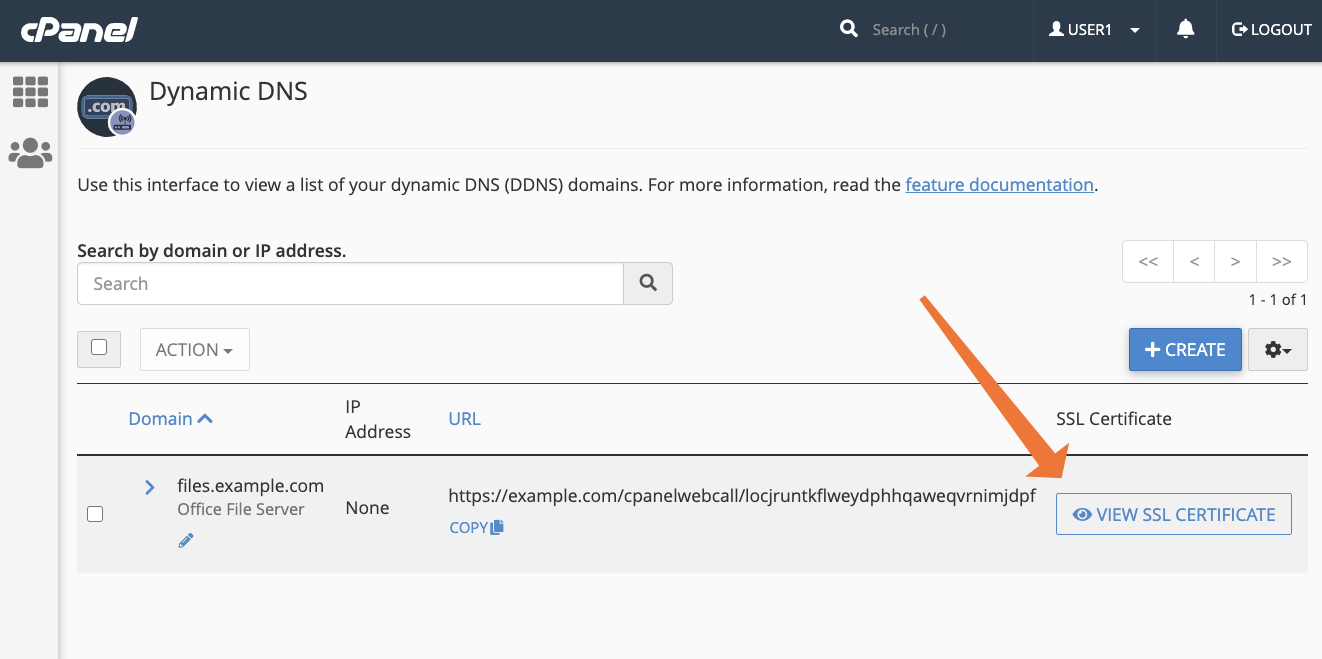
Copy the certificate content to import it into your router.
🔒 Security: We strongly recommend using SSL to prevent your credentials from being sent in plain text over the Internet.
Configuration based on your router
Each router has a different interface. Here are the general steps:
- Access your router's administration interface
- Look for a DDNS, Dynamic DNS, or Dynamic DNS section
- Select Custom or URL Update
- Enter the webcall URL provided by cPanel
- If requested, import the SSL certificate
- Save and test the configuration
Guides for popular firmwares
| Firmware | Documentation |
|---|---|
| DD-WRT | Custom DDNS configuration |
| pfSense | Custom DynDNS client |
| OPNsense | Dynamic DNS configuration |
| OpenWrt | Use the ddns-scripts package |
| Synology | Settings > External Access > DDNS > Custom |
| ASUS | WAN > DDNS > Custom Server |
Manual configuration with curl
If your router does not support custom DDNS, you can use a script on a device in your network:
#!/bin/bash
# DDNS update script for cPanel
# To be executed via cron every 5-10 minutes

WEBCALL_URL="https://mysite.com/cpanelwebcall/xxxxxxxxxxxxxxxxxxxxx"

# Calling the webcall URL
curl -s "$WEBCALL_URL"

# Log (optional)
echo "$(date): DDNS updated" >> /var/log/ddns-update.log
Cron configuration:
# Edit the crontab
crontab -e

# Add this line for an update every 5 minutes
*/5 * * * * /path/to/script-ddns.sh
Manage your DDNS domains
Regenerate the webcall URL
If you suspect your webcall URL has been compromised:
- Select the relevant domain (check the box)
- Click on Action
- Select Recreate URL
A new webcall URL will be generated. Remember to update your router configuration!
Delete a DDNS domain
- Select the relevant domain (check the box)
- Click on Action
- Select Delete
- Confirm the deletion
⚠️ Attention: This action is irreversible. The subdomain will be deleted, but the SSL certificate will be retained.
Practical Use Cases
🏠 Access a Synology/QNAP NAS
Subdomain: nas.mysite.com
Description: Synology DS920+ NAS
Port to forward: 5000 (HTTP) or 5001 (HTTPS)
NAS configuration:
- Control Panel > External Access > DDNS
- Provider: Custom
- Update URL: your webcall URL
📹 Surveillance Cameras
Subdomain: cam.mysite.com
Description: Home surveillance cameras
Port to forward: 8080 (based on your NVR/DVR)
🎮 Game Server
Subdomain: game.mysite.com
Description: Minecraft Server
Port to forward: 25565 (Minecraft)
🔐 Personal VPN Server
Subdomain: vpn.mysite.com
Description: Home OpenVPN
Port to forward: 1194 (OpenVPN UDP)
Troubleshooting
❓ IP not updating
- Check the webcall URL: Test it manually in your browser
- Check the router logs: Look for DDNS connection errors
- Check the SSL certificate: Ensure it is correctly imported
- Test with curl:
curl -v "https://mysite.com/cpanelwebcall/xxxxxxxxxxxxxxxxxxxxx"
❓ SSL certificate error
If your router rejects the certificate:
- Download the certificate from cPanel (View SSL Certificate)
- Import it into your router in the certificates section
- Or temporarily disable SSL verification (not recommended)
❓ Domain not resolving
- Wait for DNS propagation: Up to 24-48 hours for new domains
- Check with dig:
dig home.mysite.com A
- Clear your local DNS cache:
Windows:
ipconfig /flushdns
macOS:
sudo dscacheutil -flushcache; sudo killall -HUP mDNSResponder
Linux:
sudo systemd-resolve --flush-caches
❓ How to verify DDNS is working?
Compare your public IP with the domain's IP:
# Your current public IP
curl ifconfig.me

# DDNS domain IP
dig +short home.mysite.com
Both addresses should match.
Security Best Practices
🔒 Recommendations
| Practice | Importance |
|---|---|
| Use SSL for webcall | ⭐⭐⭐ Critical |
| Never share the webcall URL | ⭐⭐⭐ Critical |
| Regenerate the URL if in doubt | ⭐⭐ Important |
| Use a firewall on your network | ⭐⭐ Important |
| Limit open ports | ⭐⭐ Important |
| Use a VPN when possible | ⭐ Recommended |
🛡️ Secure exposed services
When exposing services on the Internet via DDNS:
- Change default ports when possible
- Enable authentication on all services
- Use strong passwords
- Enable fail2ban or equivalent against brute force
- Keep your software up to date
Summary
| Step | Action |
|---|---|
| 1 | Access Dynamic DNS in cPanel |
| 2 | Click on Create |
| 3 | Configure the subdomain and description |
| 4 | Copy the generated webcall URL |
| 5 | Retrieve the SSL certificate (recommended) |
| 6 | Configure your router with this information |
| 7 | Test that the update works |