Cómo Alojar un Bot de Discord (Python) en OuiPanel
Tiempo estimado : 15 minutos
Dificultad : Intermedia ⭐⭐
Tipo de servidor : Python
📋 Introducción
Esta guía explica cómo alojar un bot de Discord desarrollado con discord.py (Python) en OuiPanel. Tu bot estará en línea 24/7.
Lo que necesitas
| Requisito | Descripción |
|---|---|
| 🤖 Un bot de Discord | Creado en el Portal de Desarrolladores de Discord |
| 🔑 El token del bot | Clave secreta para conectar tu bot |
| 📁 Los archivos del bot | Tu código fuente (bot.py, requirements.txt, etc.) |
| 🐍 Un servidor Python | Adquirido en OuiHeberg |
🤖 Paso 1 : Crear el Bot en Discord
Si ya tienes tu bot y su token, pasa al paso 2.
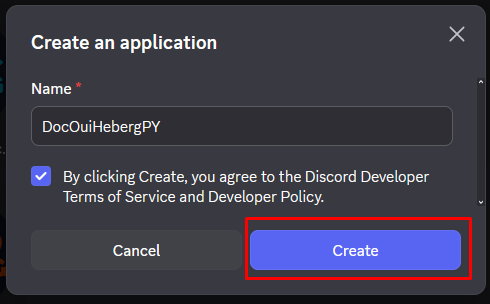
Crear la aplicación
- Ve al Portal de Desarrolladores de Discord
- Inicia sesión con tu cuenta de Discord
- Haz clic en Nueva Aplicación

- Da un nombre a tu aplicación (ej: "Mi Bot Python")
- Acepta los términos de uso
- Haz clic en Crear
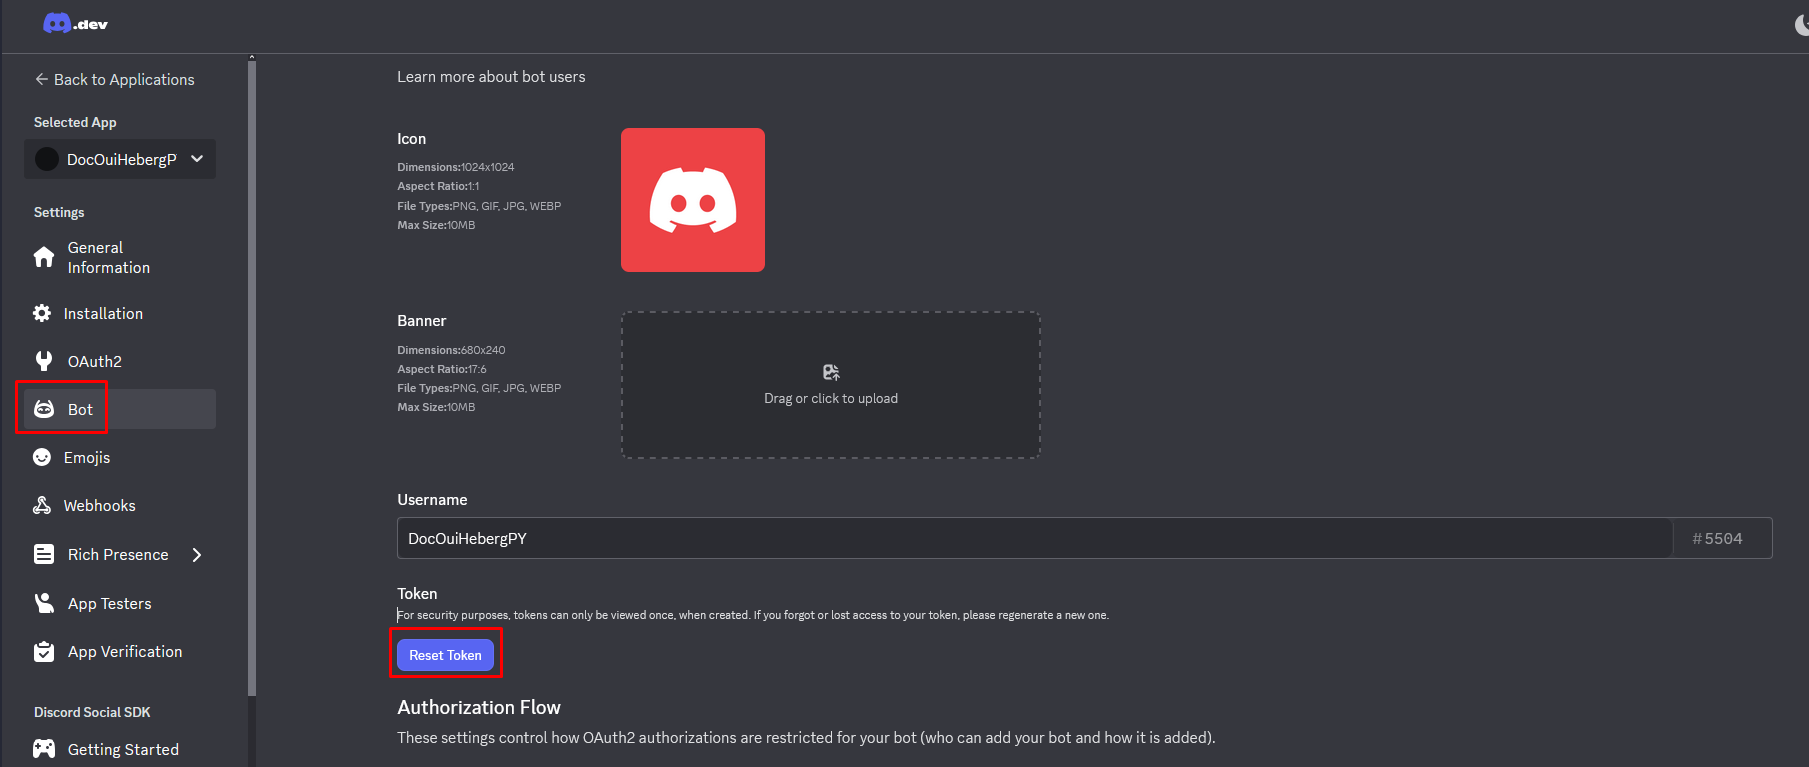
Obtener el Token
El token es la clave secreta que permite que tu código se conecte al bot.
- En la sección Bot, encuentra la zona TOKEN
- Haz clic en Reset Token
- Confirma haciendo clic en Sí, hazlo
- Haz clic en Copiar para copiar el token
⚠️ IMPORTANTE - SEGURIDAD :
- El token es como una contraseña. ¡Nunca lo compartas!
- Nunca lo incluyas en un código público (GitHub, GitLab, etc.)
- Si tu token se ve comprometido, regenerarlo inmediatamente
- Guárdalo en un lugar seguro para el siguiente paso
Activar los Intents
Los Intents permiten que tu bot acceda a cierta información (mensajes, miembros, etc.).
- En la sección Bot, desplázate hasta Privileged Gateway Intents
- Activa los intents necesarios :
| Intento | Descripción | Recomendación |
|---|---|---|
PRESENCE INTENT | Ver el estado de los miembros | Opcional |
SERVER MEMBERS INTENT | Acceder a la lista de miembros | Opcional |
MESSAGE CONTENT INTENT | Leer el contenido de los mensajes | ✅ Requerido |
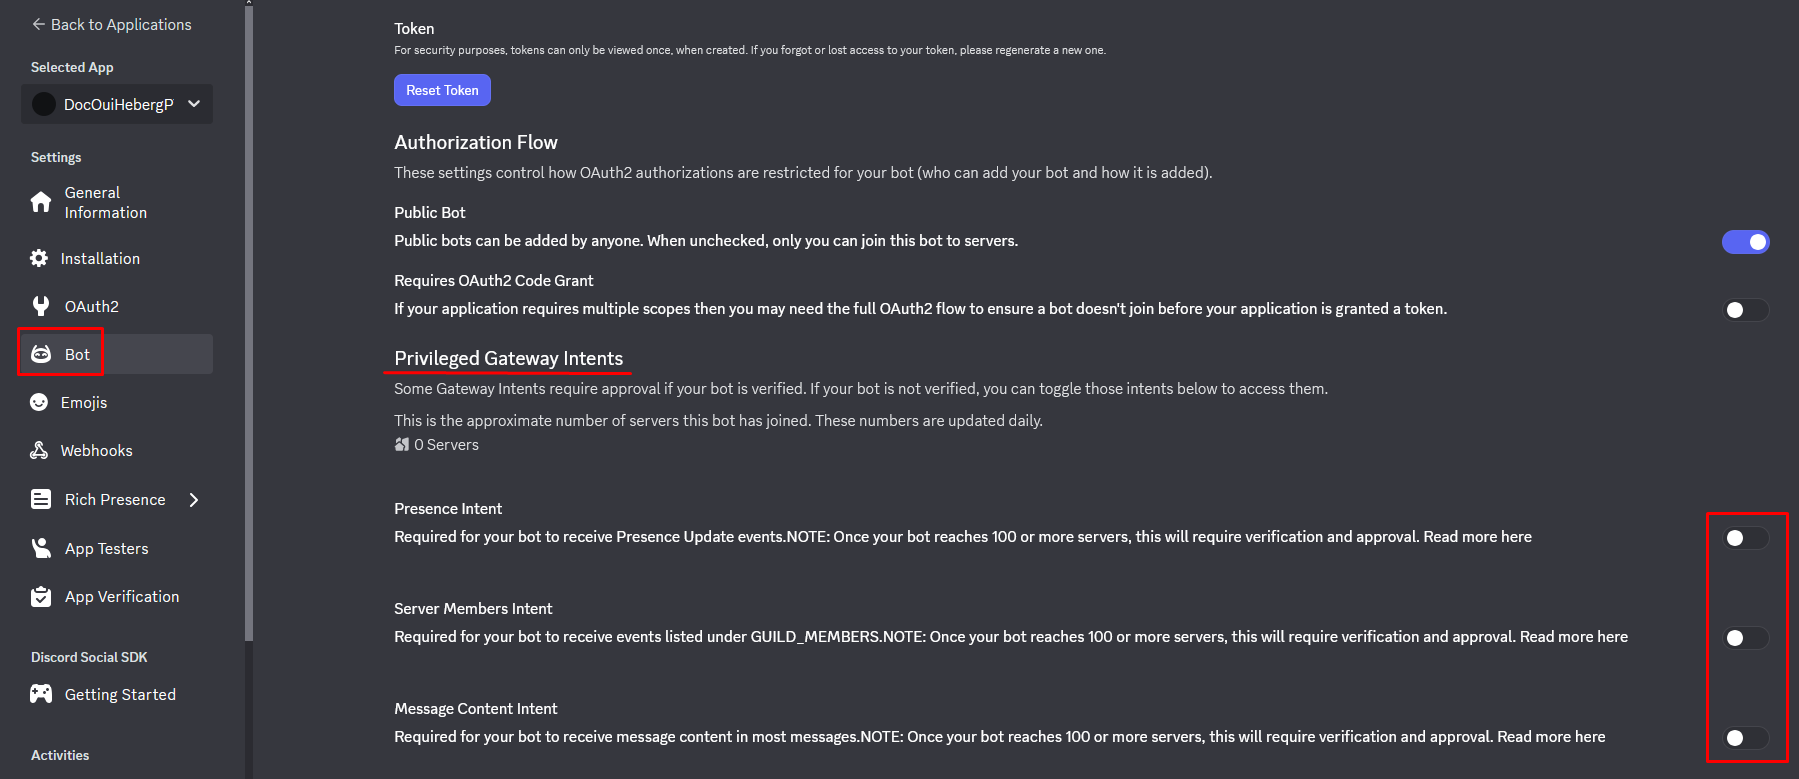
- Haz clic en Guardar Cambios
⚠️ Importante : Sin
MESSAGE CONTENT INTENT, tu bot no podrá leer el contenido de los mensajes de los usuarios.
Invitar al Bot a tu Servidor de Discord
- En el menú de la izquierda, haz clic en OAuth2
- Haz clic en Generador de URL
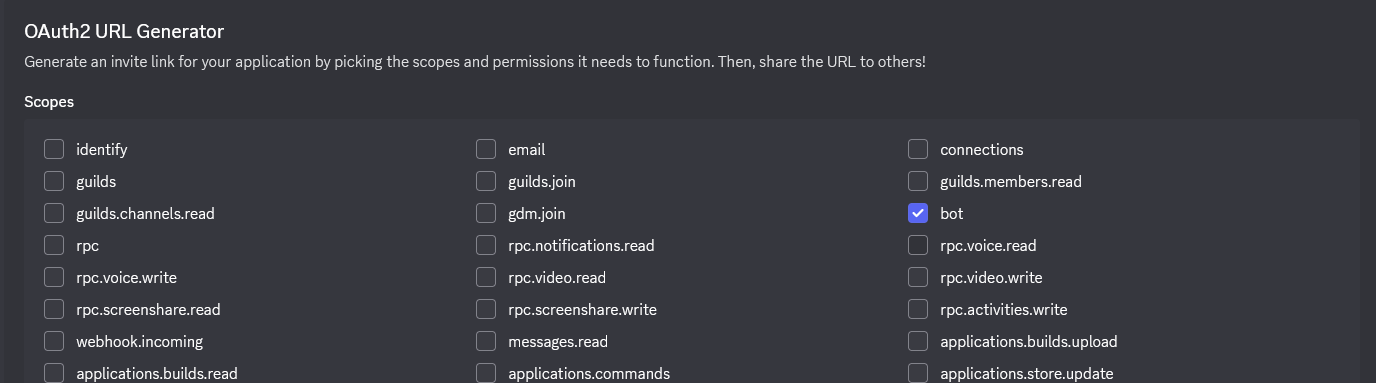
- En la sección SCOPES, marca :
- ✅
bot
- ✅
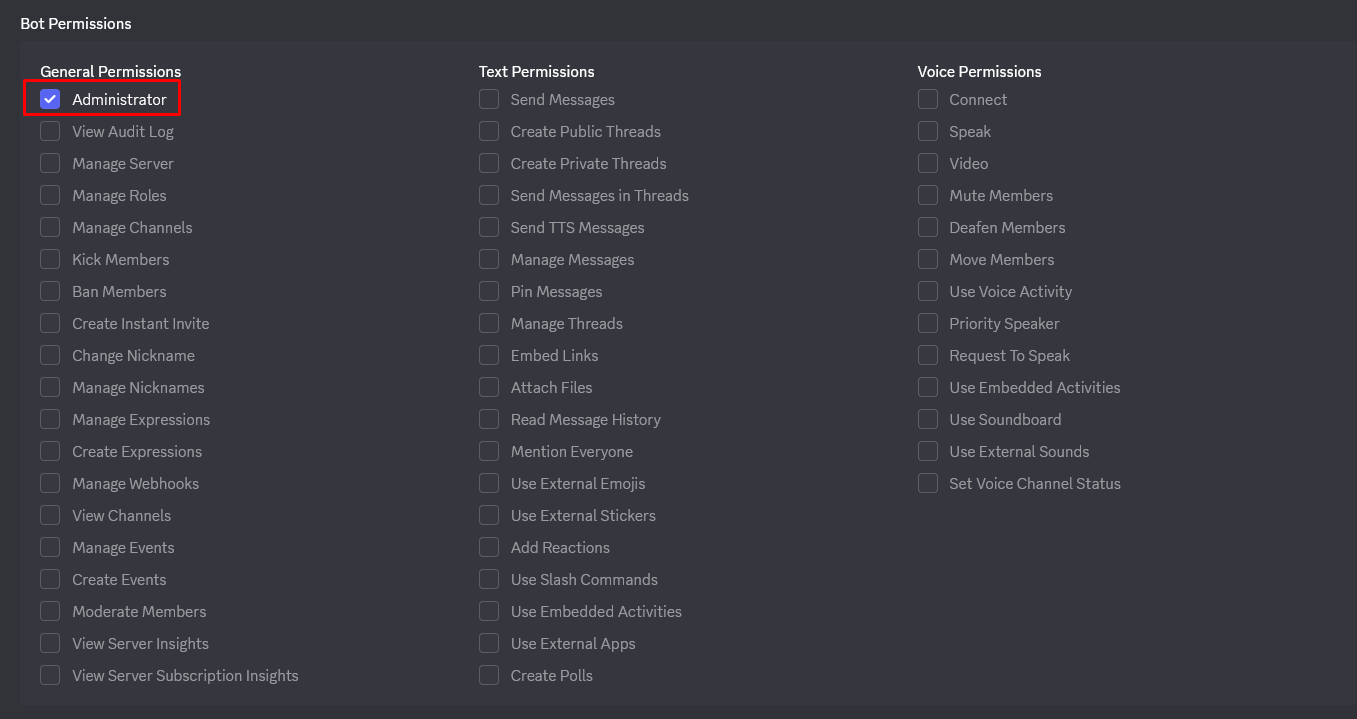
- En la sección PERMISOS DEL BOT, marca los permisos necesarios :
| Permiso | Descripción |
|---|---|
Administrator | Todos los permisos (simple pero amplio) |
| O permisos específicos : | |
Send Messages | Enviar mensajes |
Read Message History | Leer el historial |
Embed Links | Enviar embeds |
Attach Files | Adjuntar archivos |
Use Slash Commands | Usar comandos slash |
- Al final de la página, copia la URL generada

- Abre esta URL en tu navegador
- Selecciona el servidor donde invitar al bot
- Haz clic en Autorizar
- Completa el captcha si es necesario
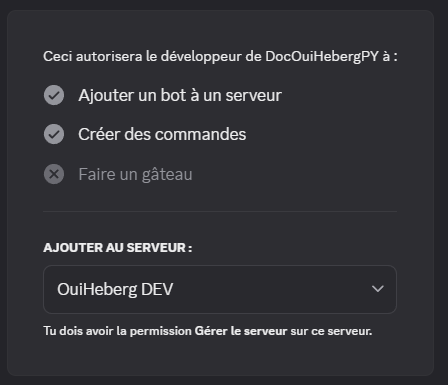
✅ Tu bot ahora aparece en la lista de miembros de tu servidor (fuera de línea por ahora).
📁 Paso 2 : Preparar los Archivos del Bot
Estructura de los archivos
Tu bot debe tener esta estructura:
📁 MiBotPython/
├── 📄 bot.py             ← Archivo principal (o main.py, index.py...)
├── 📄 requirements.txt   ← Dependencias Python
├── 📄 .env               ← Token del bot (creado en el servidor)
└── 📁 cogs/              ← (Opcional) Carpeta de módulos
Archivo requirements.txt
Crea un archivo requirements.txt con las dependencias discord.py y python-dotenv :
audioop-lts==0.2.1
discord.py==2.3.2
python-dotenv==1.0.0
💡 Estos dos paquetes son esenciales :
discord.py: La biblioteca para interactuar con Discordpython-dotenv: Para cargar el token desde el archivo.env
Archivo principal (bot.py)
Crea tu archivo principal con python-dotenv para cargar el token :
import os
import discord
from discord.ext import commands
from dotenv import load_dotenv

# Load environment variables from .env
load_dotenv()

# Intents configuration
intents = discord.Intents.default()
intents.message_content = True

# Bot creation with a prefix
bot = commands.Bot(command_prefix='!', intents=intents)

# Event: Bot ready
@bot.event
async def on_ready():
    print(f'✅ Bot connected as {bot.user.name}')
    print(f'📊 Connected to {len(bot.guilds)} server(s)')

# Command: !ping
@bot.command()
async def ping(ctx):
    """Responds Pong with latency"""
    latency = round(bot.latency * 1000)
    await ctx.send(f'🏓 Pong! Latency: {latency}ms')

# Command: !hello
@bot.command()
async def hello(ctx):
    """Says hello"""
    await ctx.send(f'👋 Hello {ctx.author.name}!')

# Error handling
@bot.event
async def on_command_error(ctx, error):
    if isinstance(error, commands.CommandNotFound):
        await ctx.send('❌ Unknown command.')
    else:
        print(f'Error: {error}')

# Connect with the token from .env
bot.run(os.getenv('DISCORD_TOKEN'))
⚠️ Important:
load_dotenv()must be called before usingos.getenv().
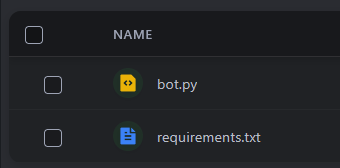
📤 Step 3: Upload Files to OuiPanel
Using the File Manager
- Log in to OuiPanel
- Select your Python server
- In the side menu, click on File Manager
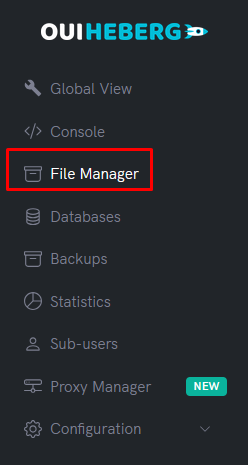
- Delete default files (if any)
- Click on Upload
- Upload your files:
bot.py(ormain.py,index.py...)requirements.txt- Your folders (
cogs/...) if needed
⚠️ Do not upload: The
.envfile will be created directly on the server in the next step (more secure).
Using SFTP (Recommended for multiple files)
- Connect via SFTP with FileZilla
- Drag and drop all the content from your bot folder
- Ensure all files are successfully uploaded
📖 Check the guide "SFTP Access with FileZilla" for detailed instructions.
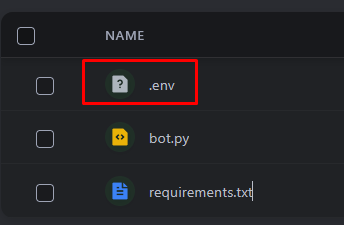
🔑 Step 4: Create the .env File (Token)
Never put your token directly in the code! Create a .env file on the server.
Create the .env file
- In the File Manager, click on New file
- Name it
.env(with the dot in front) - Add the following content:
# Discord bot token
DISCORD_TOKEN=your_token_here
- Replace
your_token_herewith the token copied in Step 1 - Click on Create or Save
Example with a real token (format):
DISCORD_TOKEN=MTIzNDU2Nzg5MDEyMzQ1Njc4OQ.ABcdEF.abcdefghijklmnopqrstuvwxyz123456
Example with multiple variables:
# Discord bot token
DISCORD_TOKEN=MTIzNDU2Nzg5MDEyMzQ1Njc4OQ.ABcdEF.abcdefghijklmnopqrstuvwxyz123456

# Command prefix
PREFIX=!

# Owner ID (optional)
OWNER_ID=123456789012345678
⚠️ Important:
- No spaces around the
=- No quotes around the values
- Never share this file
Final structure on the server
📁 Root of the server/
├── 📄 .env               ← Contains DISCORD_TOKEN
├── 📄 bot.py             ← Your code
├── 📄 requirements.txt   ← Dependencies
└── ...
⚙️ Step 5: Configure the Startup File
OuiPanel needs to know which Python file to run at startup.
Accessing the settings
- In the side menu, click on Configuration
- Click on Server Settings
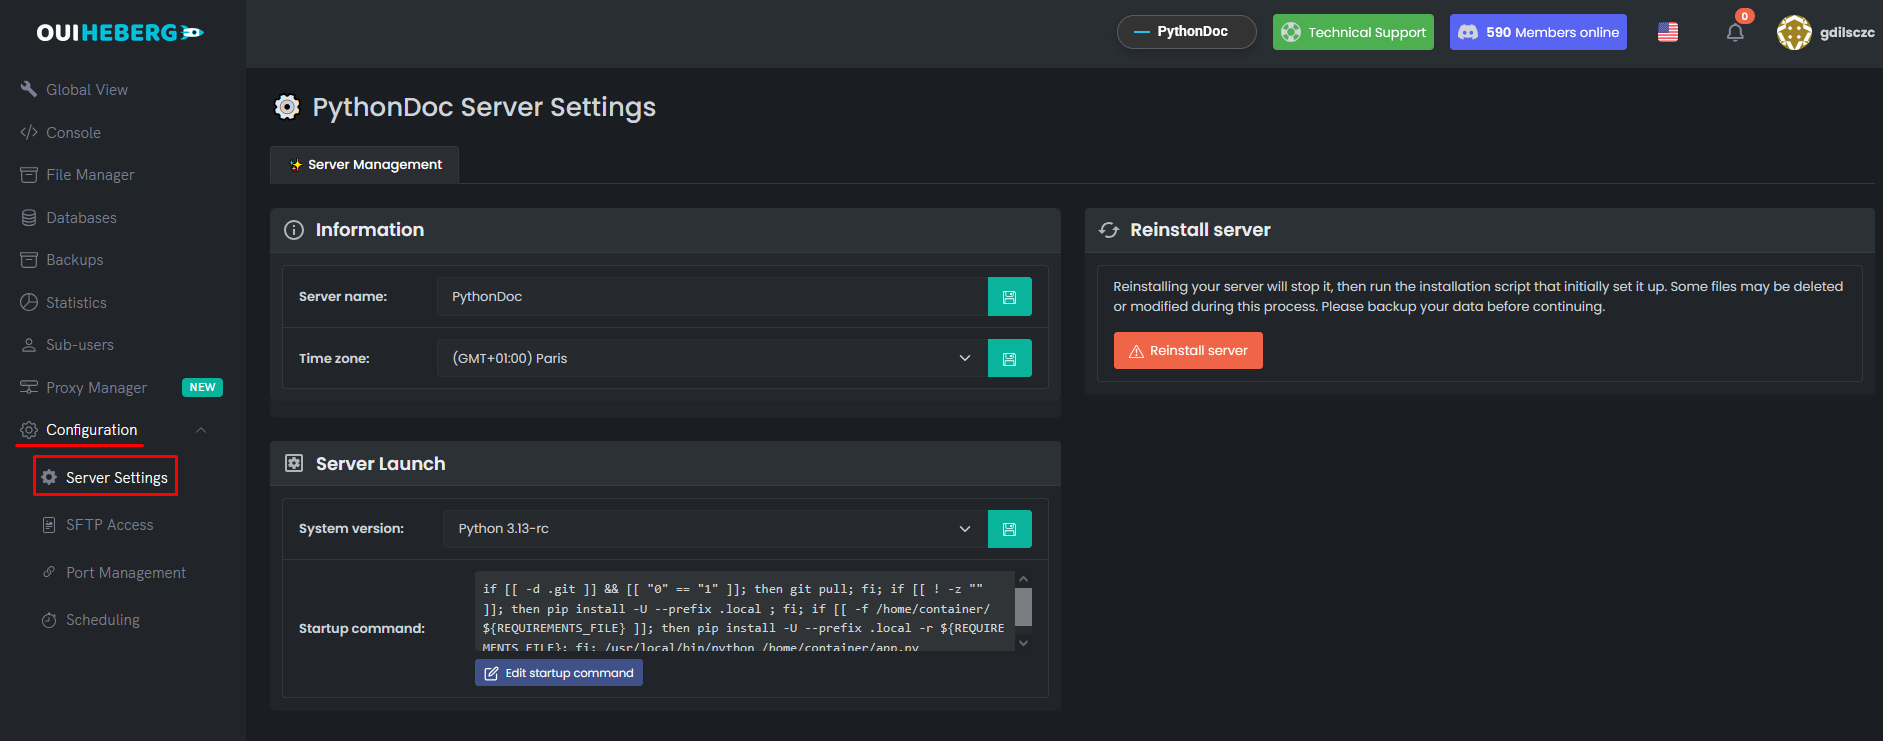
Configure the file to run
Locate the File to execute field:
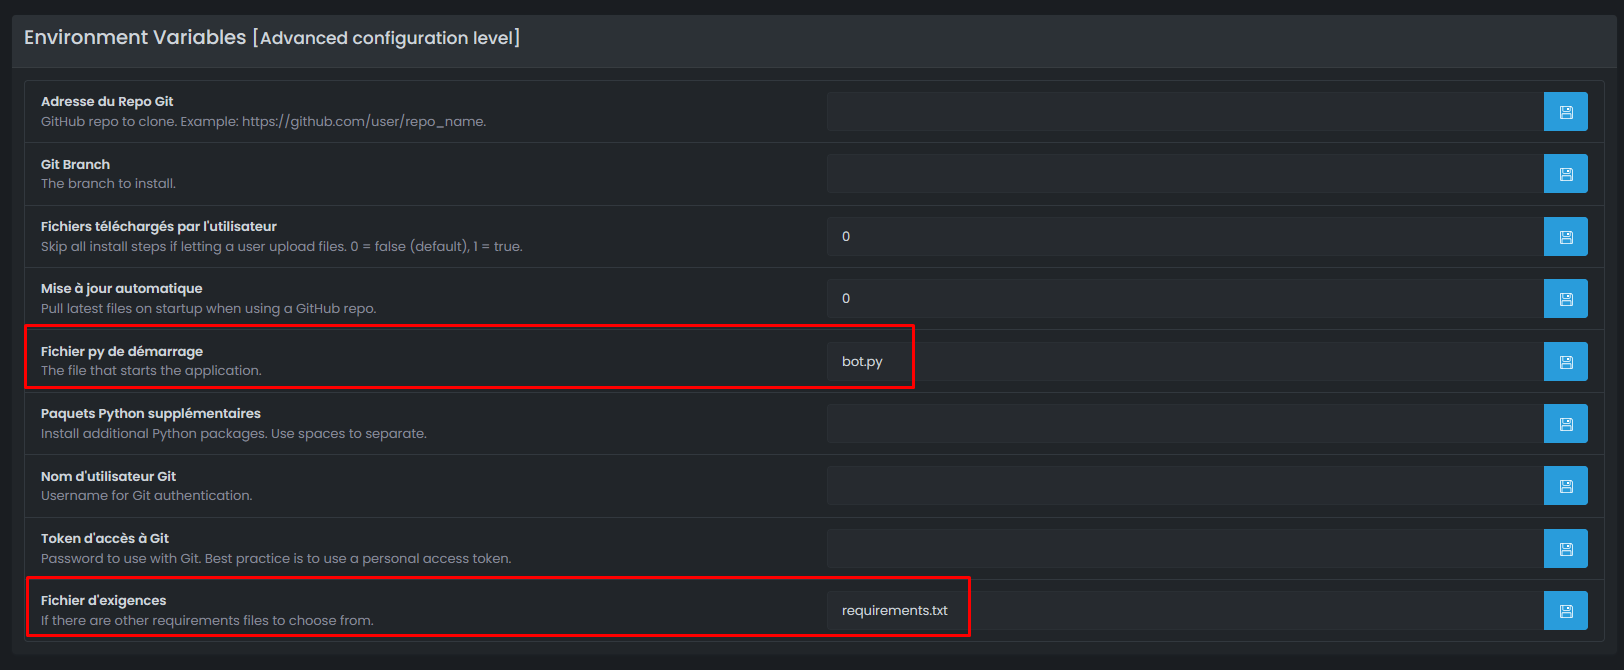
| Your main file | Value to set |
|---|---|
bot.py | bot.py |
main.py | main.py |
index.py | index.py |
app.py | app.py |
src/bot.py | src/bot.py |
⚠️ Important: The name must match exactly your file (case-sensitive).
🚀 Step 6: Start the Bot
Launch the server
- In the side menu, click on Console
- Click on Start
Automatic installation of dependencies
On the first start, the server automatically installs packages from requirements.txt:
Installing requirements from requirements.txt...
Collecting discord.py==2.3.2
Collecting python-dotenv==1.0.0
Successfully installed discord.py-2.3.2 python-dotenv-1.0.0

Running bot.py...
✅ Bot connected as MyBot
📊 Connected to 1 server(s)
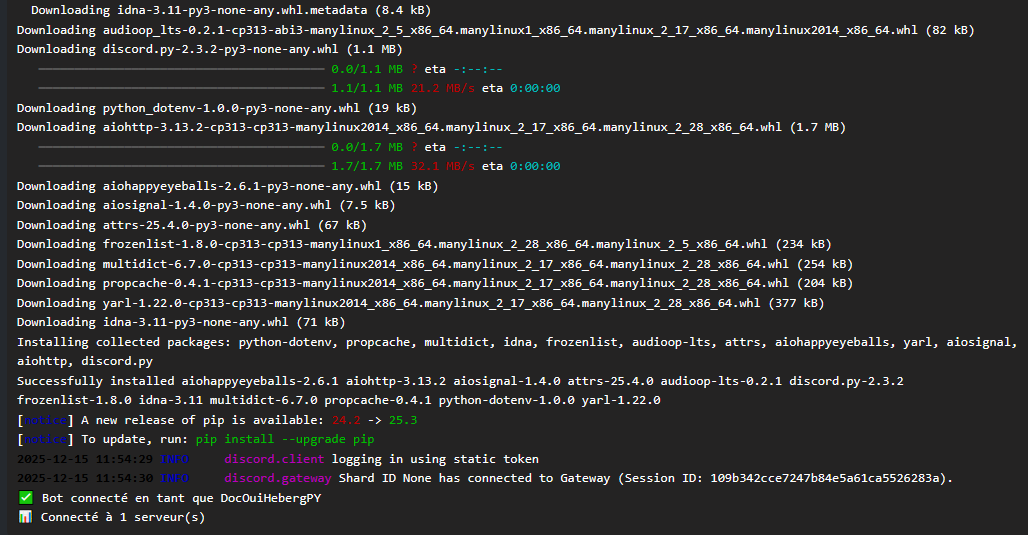
✅ Step 7: Verify the Bot is Working
In the OuiPanel Console
You should see:
✅ Bot connected as MyBot
📊 Connected to 1 server(s)
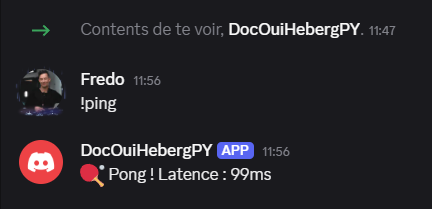
On Discord
- Open Discord
- Go to the server where you invited the bot
- Your bot should appear online (green dot)
- Test a command:
!ping - The bot responds: 🏓 Pong! Latency: XXms
🔧 Troubleshooting
The bot doesn't start
| ❌ Error | ✅ Solution |
|---|---|
ModuleNotFoundError: No module named 'discord' | Check requirements.txt and restart |
ModuleNotFoundError: No module named 'dotenv' | Add python-dotenv to requirements.txt |
FileNotFoundError: bot.py | Incorrect startup file configured |
SyntaxError | Error in your Python code |
Error de Token
| ❌ Error | ✅ Solución |
|---|---|
LoginFailure: Improper token has been passed | Verifique el token en .env |
HTTPException: 401 Unauthorized | Token inválido, regenérelo |
PrivilegedIntentsRequired | Active los intents en el portal de Discord |
El bot no lee los mensajes
| ❌ Causa | ✅ Solución |
|---|---|
| MESSAGE CONTENT INTENT desactivado | Actívelo en el portal de Discord |
| Intents mal configurados en el código | Agregue intents.message_content = True |
Verifique su código :
intents = discord.Intents.default()
intents.message_content = True  # ¡Esta línea es obligatoria!
El archivo .env no se lee
| ❌ Causa | ✅ Solución |
|---|---|
| python-dotenv no instalado | Verifique requirements.txt |
| load_dotenv() no llamado | Agregue load_dotenv() antes de os.getenv() |
| Archivo mal nombrado | El archivo debe llamarse exactamente .env |
| Formato incorrecto | No hay espacios alrededor del = |
pip install falla
| ❌ Error | ✅ Solución |
|---|---|
requirements.txt not found | Verifique que el archivo esté en la raíz |
Could not find a version | Verifique los nombres y versiones de los paquetes |
🔒 Seguridad del archivo .env
| ✅ A hacer | ❌ A no hacer |
|---|---|
Mantener el .env solo en el servidor | Compartir el .env |
Crear el .env directamente en OuiPanel | Poner el token en el código |
Agregar .env al .gitignore | Hacer commit del .env en GitHub |
Archivo .gitignore recomendado :
# Variables de entorno
.env
.env.local

# Python
__pycache__/
*.py[cod]
venv/
💡 Buenas Prácticas
Seguridad
- ✅ Nunca comparta su token
- ✅ Cree el
.envdirectamente en el servidor - ✅ Regenere el token si está comprometido
Rendimiento
- ✅ Solo active los intents necesarios
- ✅ Utilice
commands.Boten lugar dediscord.Clientpara los comandos - ✅ Utilice los Cogs para organizar su código
Código
- ✅ Maneje los errores con try/except
- ✅ Agregue logs con
print()o el módulologging - ✅ Utilice Cogs para los bots grandes
📂 Estructura Avanzada con Cogs (Recomendada)
Para un bot más organizado :
📁 MonBotPython/
├── 📄 bot.py               ← Punto de entrada
├── 📄 requirements.txt
├── 📄 .env                 ← Creado en el servidor
├── 📁 cogs/
│   ├── 📄 moderation.py    ← Comandos de moderación
│   ├── 📄 fun.py           ← Comandos divertidos
│   └── 📄 utility.py       ← Comandos de utilidad
└── 📄 config.py            ← Configuración no sensible
Ejemplo de bot.py con Cogs :
import os
import discord
from discord.ext import commands
from dotenv import load_dotenv

load_dotenv()

intents = discord.Intents.default()
intents.message_content = True

bot = commands.Bot(command_prefix='!', intents=intents)

# Cargar los cogs al inicio
@bot.event
async def on_ready():
    print(f'✅ Bot conectado como {bot.user.name}')

    # Cargar los cogs
    for filename in os.listdir('./cogs'):
        if filename.endswith('.py'):
            await bot.load_extension(f'cogs.{filename[:-3]}')
            print(f'📦 Cog cargado : {filename}')

bot.run(os.getenv('DISCORD_TOKEN'))
Ejemplo de cog (cogs/fun.py) :
import discord
from discord.ext import commands

class Fun(commands.Cog):
    def __init__(self, bot):
        self.bot = bot

    @commands.command()
    async def ping(self, ctx):
        """Responde Pong !"""
        latencia = round(self.bot.latency * 1000)
        await ctx.send(f'🏓 Pong ! Latencia : {latencia}ms')

    @commands.command()
    async def hello(self, ctx):
        """Dice hola"""
        await ctx.send(f'👋 Hola {ctx.author.name} !')

async def setup(bot):
    await bot.add_cog(Fun(bot))
📝 Resumen
1. Crear el bot en Discord Developer Portal
2. Obtener el Token (Reset Token → Copy)
3. Activar MESSAGE CONTENT INTENT
4. Invitar al bot (OAuth2 → URL Generator → bot + applications.commands)
5. Preparar los archivos (bot.py + requirements.txt con python-dotenv)
6. Subir los archivos a OuiPanel (sin el .env)
7. Crear el archivo .env en el servidor con el token
8. Configurar el archivo de inicio (bot.py, main.py...)
9. Iniciar el servidor
10. Verificar que el bot está en línea en Discord → !ping¿Necesitas alojamiento Python?
Despliega tus aplicaciones Python con nuestro alojamiento optimizado y soporte dedicado.