Installing mods on a Satisfactory server with SMM
Introduction
SatisfactoryModManager (SMM) greatly simplifies the installation of mods on your dedicated server. No more need to manually transfer files: the software connects directly to your server via SFTP and handles everything automatically.
Prerequisites
| Item | Description |
|---|---|
| SatisfactoryModManager | Free software to install on your PC |
| SFTP credentials | Available on your OuiHeberg panel |
| Satisfactory server | Already configured and functional |
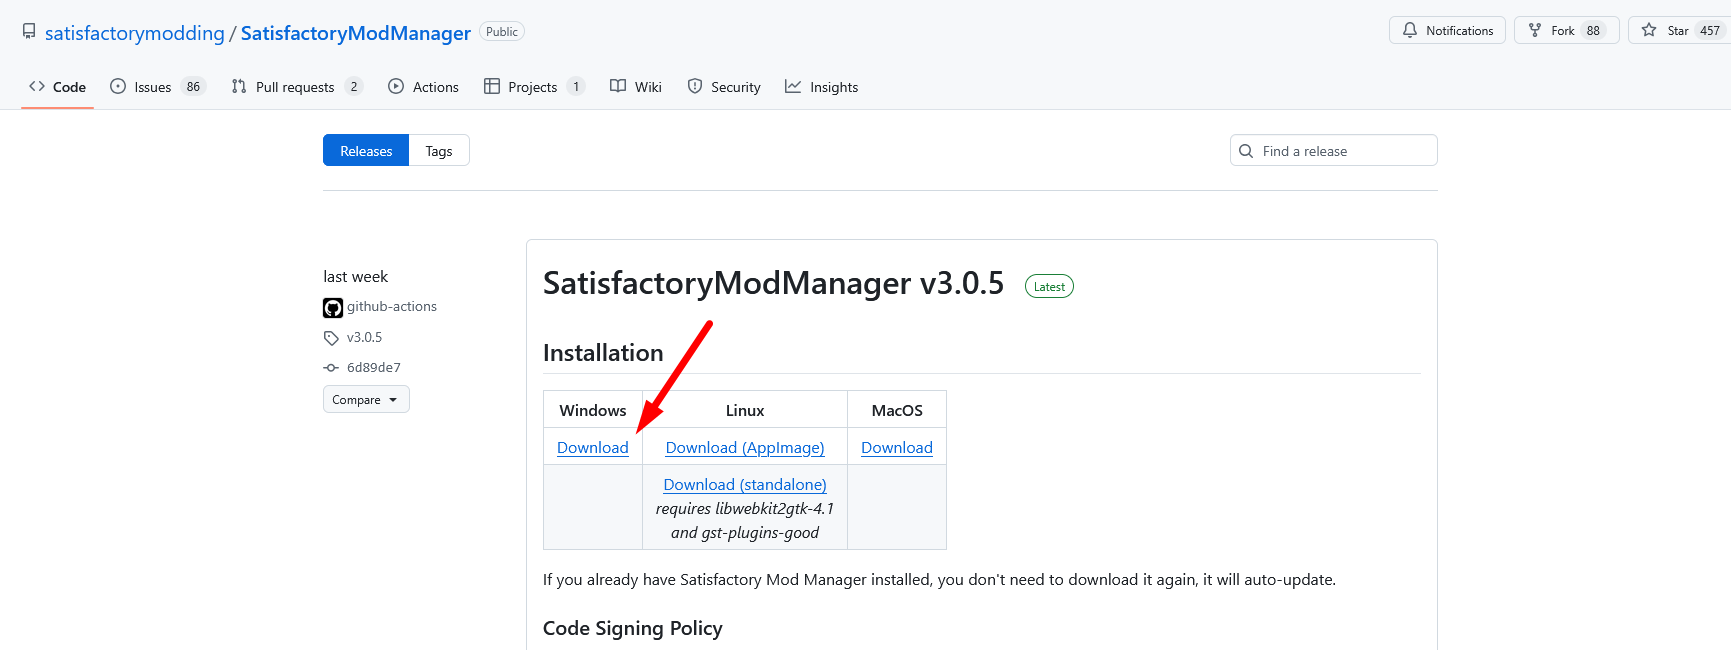
Step 1: Download SatisfactoryModManager
First, install SMM on your computer. It will manage the addition and removal of mods on your server.
-
Go to the official GitHub releases page:
https://github.com/satisfactorymodding/SatisfactoryModManager/releases -
Click on the Download button to get the latest version
-
Run the downloaded
SatisfactoryModManager-Setup.exefile -
Follow the installation steps
-
At first launch, select your language as the interface language
Step 2: Retrieve your SFTP credentials
You will need your SFTP connection information to link SMM to your server.
- Log in to your OuiHeberg panel
- Access the SFTP or Access section of your server
- Note the following information:
| Information | Example |
|---|---|
| Host / Address | sftp.ouiheberg.com |
| Port | 2022 |
| Username | your_username |
| Password | your_password |
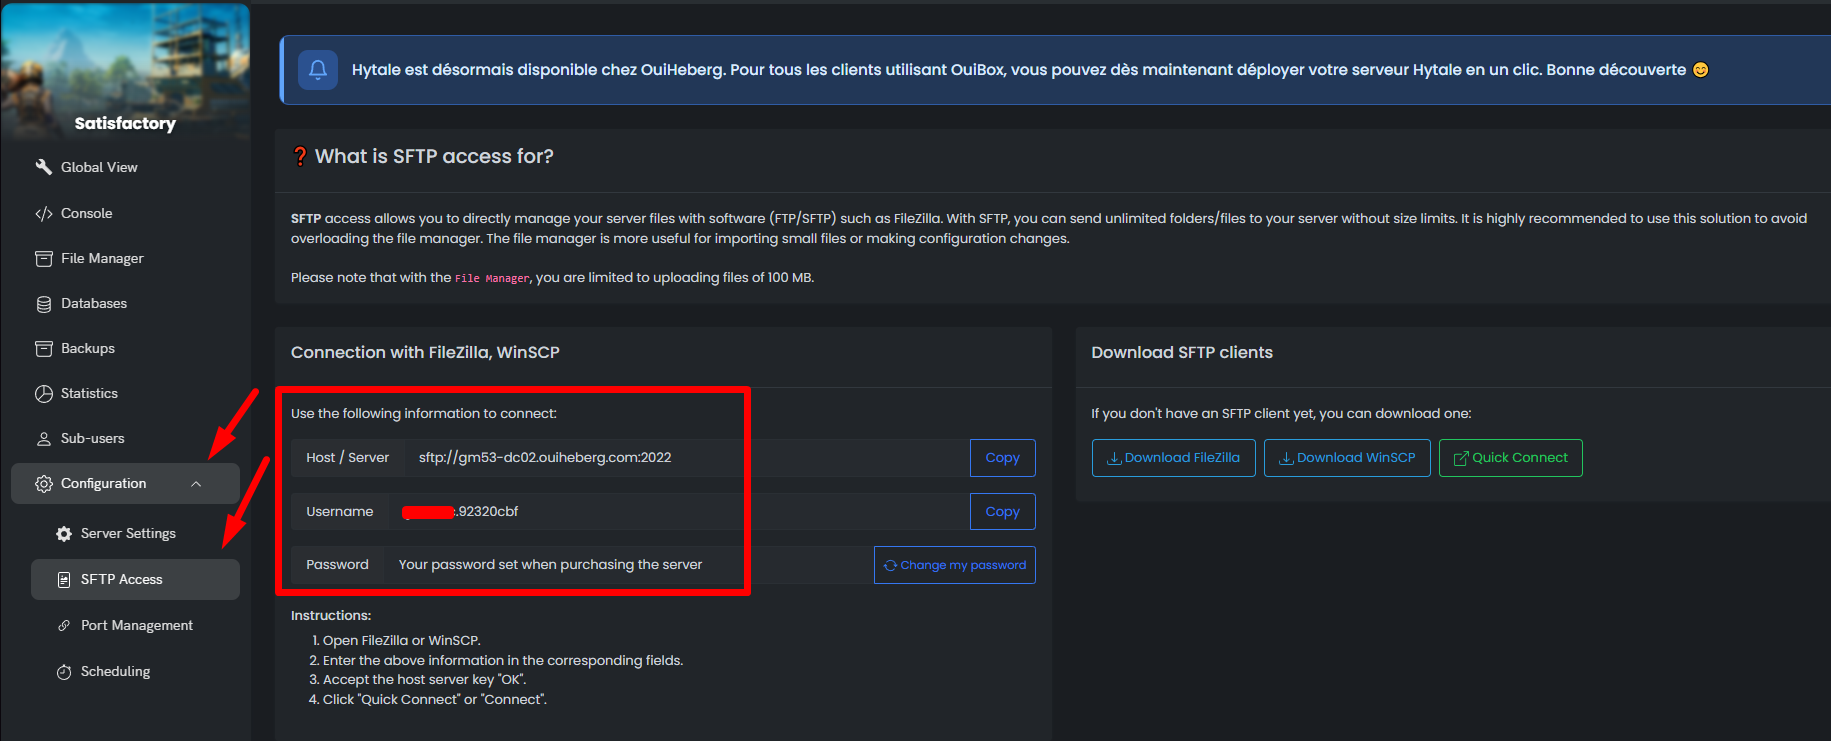
🚨 Security: Never share your SFTP credentials with anyone.
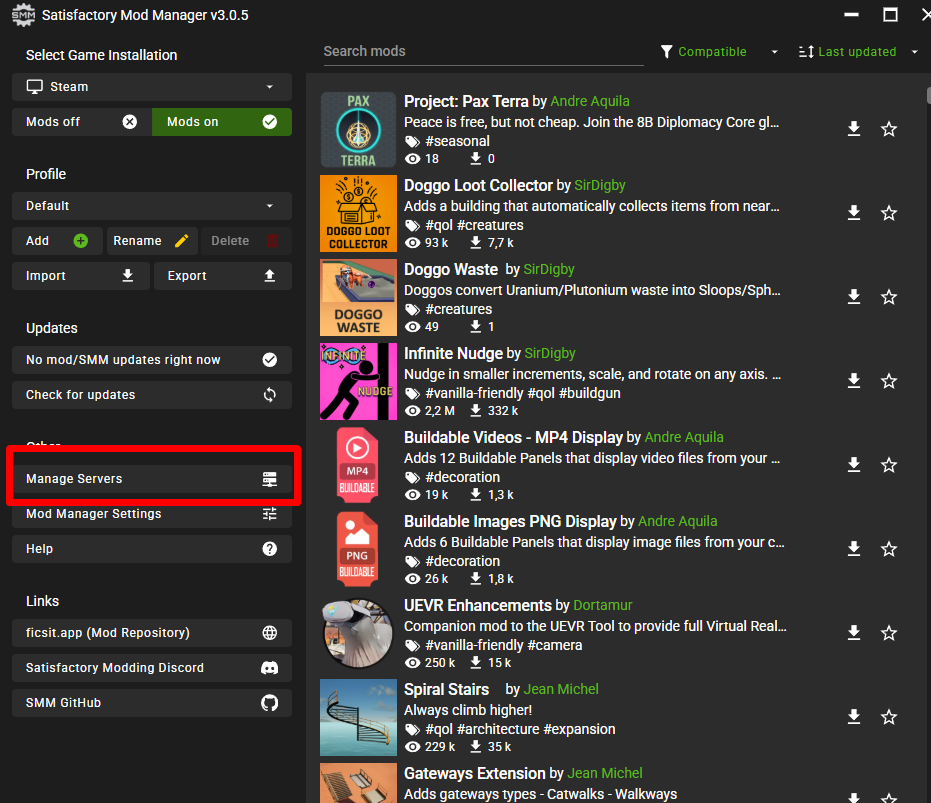
Step 3: Connect your server to SMM
Now that SMM is installed, link it to your Satisfactory server.
3.1 Open the server manager
- In SMM, click on Manage servers in the menu bar
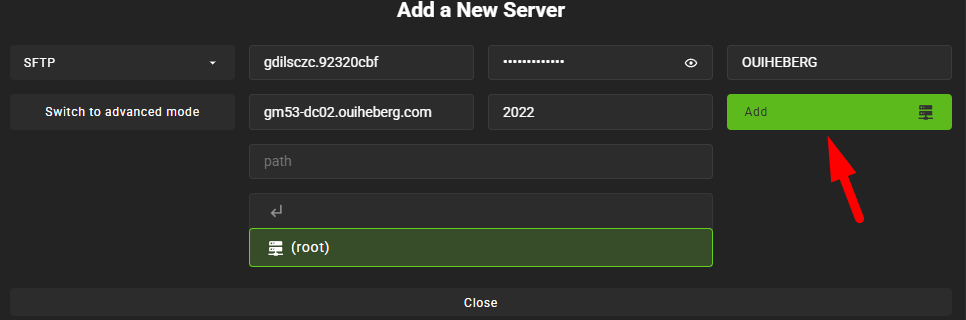
3.2 Enter the SFTP credentials
- A pop-up window appears
- Fill in the fields with your previously retrieved SFTP credentials
| SMM Field | Value to enter |
|---|---|
| Host | SFTP address from your panel |
| Port | SFTP port (usually 2022) |
| User | Your SFTP username |
| Password | Your SFTP password |
3.3 Select the active server
- In the top left of SMM, open the dropdown list
- Choose the server you just added
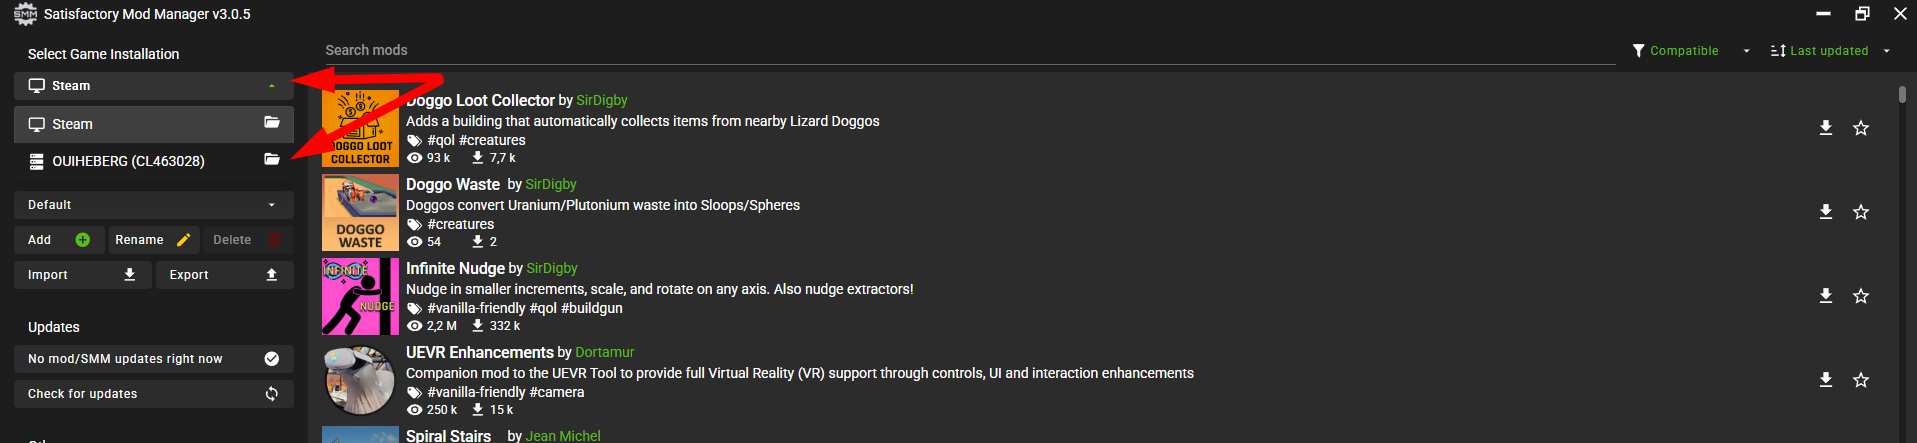
📝 Tips: If you manage multiple servers, give them distinct names to avoid any confusion.
Step 4: Install the mods
Your server is connected, now it's time to choose your mods.
4.1 Browse available mods
- In the right panel, explore the mods library
- Use the search bar to find a specific mod
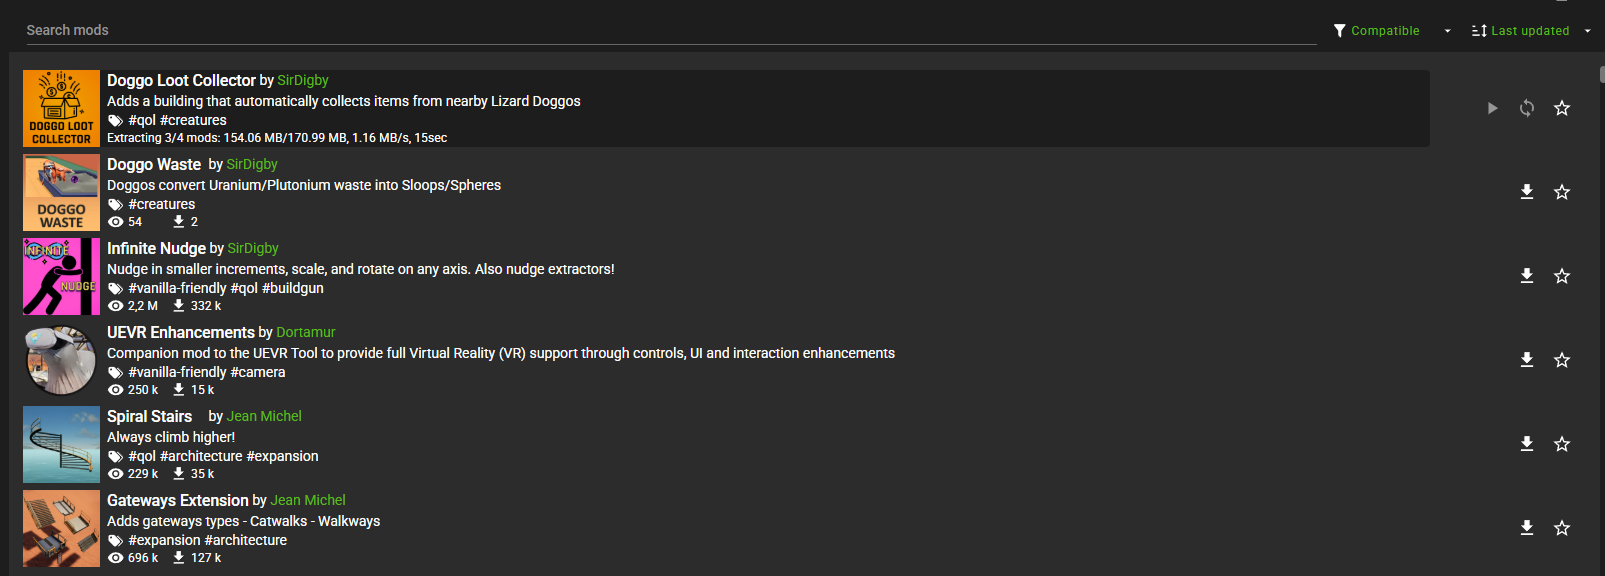 4.2 Activate desired mods
- Click on the activation button next to each desired mod
- SMM automatically transfers the files to your server

| Action | Result |
|---|---|
| Activate a mod | Files are copied to the server |
| Deactivate a mod | Files are removed from the server |
4.3 Restart the server
- Once your mods are selected, restart your server from the OuiHeberg panel
⚠️ Required: A complete restart is essential after each mod modification to avoid malfunctions.
Step 5: Join and play
After the restart:
- Launch Satisfactory normally on your PC
- Join your server
- The mods are automatically active

| Situation | Solution |
|---|---|
| A mod is causing issues | Disable it in SMM, restart the server |
| The server doesn't start | Disable all mods, re-enable them one by one |
| Incompatible mod | Check the mod version and your server's version |
Summary of screenshots
| No. | Content of the screenshot |
|---|---|
| 1 | GitHub SMM page with Download button |
| 2 | Language selection (French) on first launch |
| 3 | OuiHeberg panel - SFTP section with credentials |
| 4 | SMM Menu - "Manage servers" option |
| 5 | SFTP connection pop-up (empty fields) |
| 6 | Selection of the SatisfactoryDedicatedServer or FactoryGame folder |
| 7 | Server selection dropdown |
| 8 | Mods library with search bar |
| 9 | Mod activation button |
Summary
Thanks to SatisfactoryModManager, installing mods on your Satisfactory server becomes trivial. Connect your server via SFTP, activate the mods of your choice, restart, and you're good to go. No more manual file manipulation needed.
Need a Satisfactory server?
Discover our Satisfactory hosting plans starting from $9.98/month with instant deployment.