Managing MySQL Databases on cPanel
OuiHeberg - Technical Documentation
Complete guide to create and manage your MySQL/MariaDB databases
What is a MySQL Database?
A MySQL database (or MariaDB) is a data management system that allows you to store, organize, and retrieve information in a structured way. It is essential for running most modern web applications.
Common use cases:
- CMS : WordPress, Joomla, Drupal, PrestaShop
- Forums : phpBB, MyBB, Discourse
- E-commerce : WooCommerce, Magento, OpenCart
- Custom applications : Dynamic sites in PHP, Python, Node.js
Important Terminology
| Term | Description |
|---|---|
| Database | Container that stores your tables and data |
| MySQL User | Account with credentials to access databases |
| Privileges | Permissions granted to a user on a database |
| phpMyAdmin | Web interface to visually manage your databases |
Accessing Database Tools
Logging into cPanel
- Log in to your client area at OuiHeberg
- Access your hosting and click on Access cPanel
Available Tools
In the Databases section of cPanel, you will find several tools:
| Tool | Description |
|---|---|
| Manage My Databases | Complete management of databases and users |
| Database Wizard | Step-by-step wizard to create a database |
| phpMyAdmin | Graphical interface to manage database content |
| Remote MySQL | Allow remote connections |
Method 1: Using the Database Wizard (Recommended for Beginners)
The Database Wizard is the simplest method to create a complete database in a few steps.
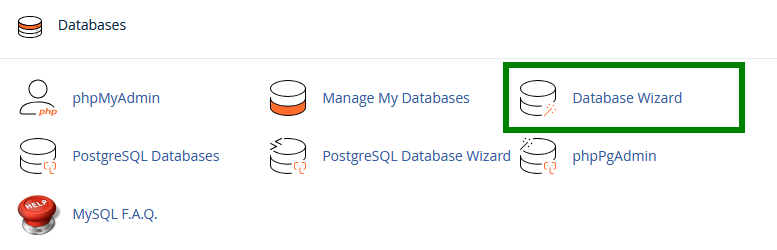
Step 1: Open the Wizard
In cPanel, click on Database Wizard in the Databases section.
Step 2: Create the Database
Enter the name of your new database and click on Next Step.
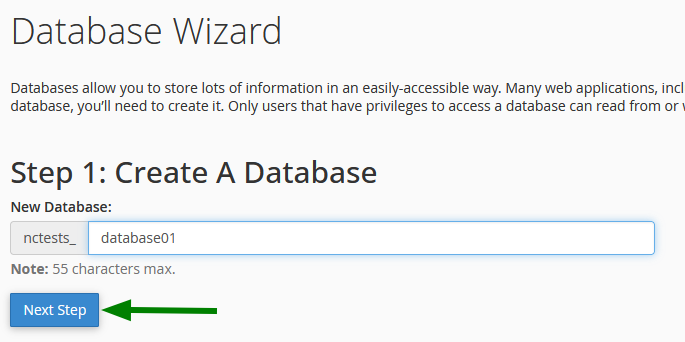
💡 Note : cPanel automatically adds a prefix to your database name (e.g.,
youruser_dbname). This full name should be used in your applications.
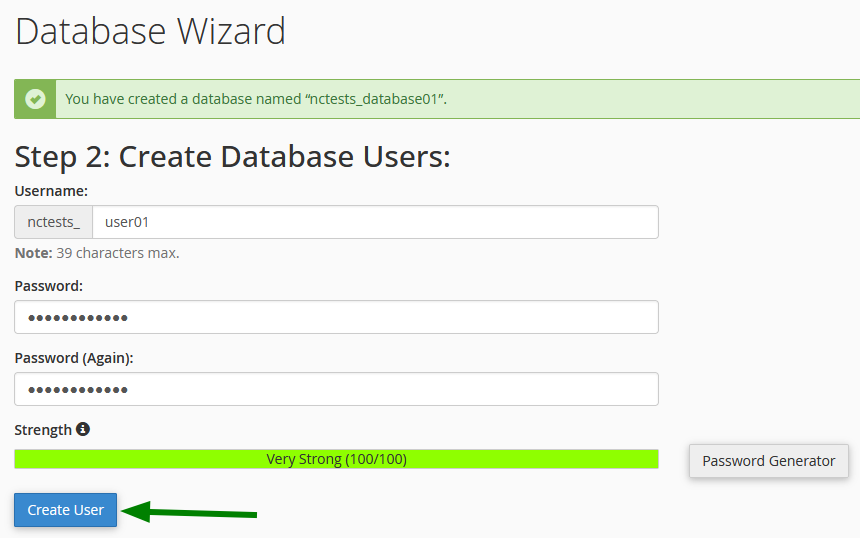
Step 3: Create the User
Create a MySQL user with a secure password.
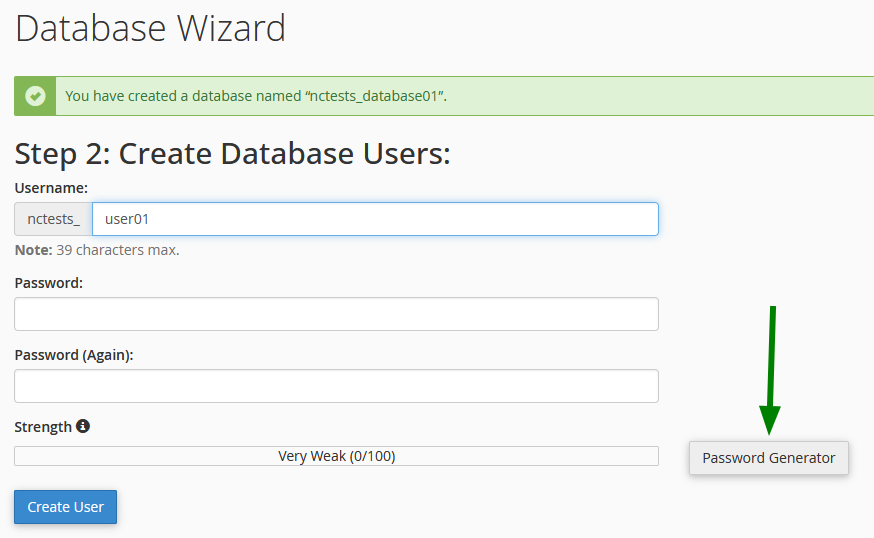
Password recommendations:
- Minimum 12 characters
- Mix of uppercase, lowercase, numbers, and symbols
- Use the built-in Password Generator to create a strong password
Click on Create User to proceed.
Step 4: Assign Privileges
Select the privileges to grant to the user on this database.
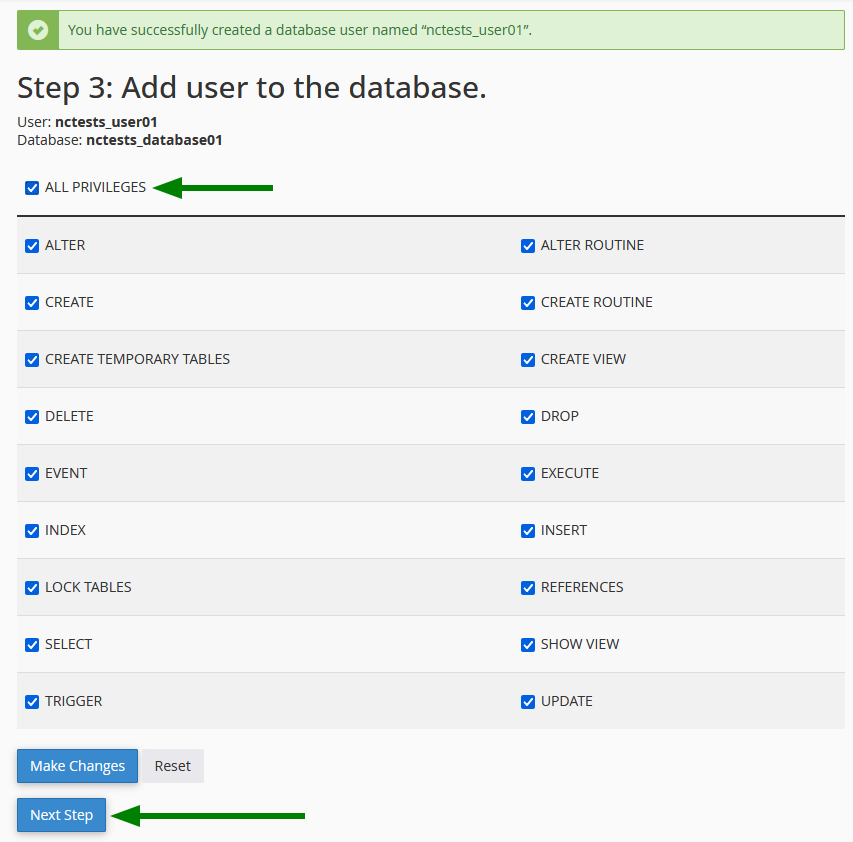
For standard use (WordPress, website, etc.), check ALL PRIVILEGES.
Click on Next Step to finalize.
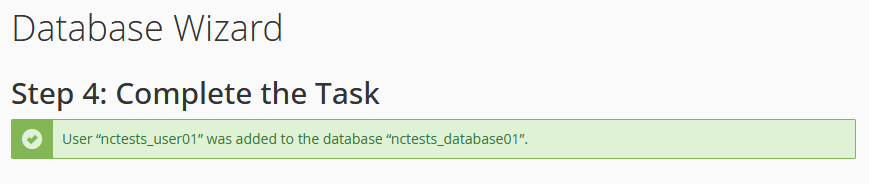
Step 5: Confirmation
You will receive a summary of your configuration:
Information to keep:
Database Name: prefix_dbname
MySQL User: prefix_user
Password: your_password
MySQL Server (hostname): localhost
MySQL Port: 3306
Method 2: Using Manage My Databases (Advanced Management)
This method provides more control and allows separate management of databases and users.
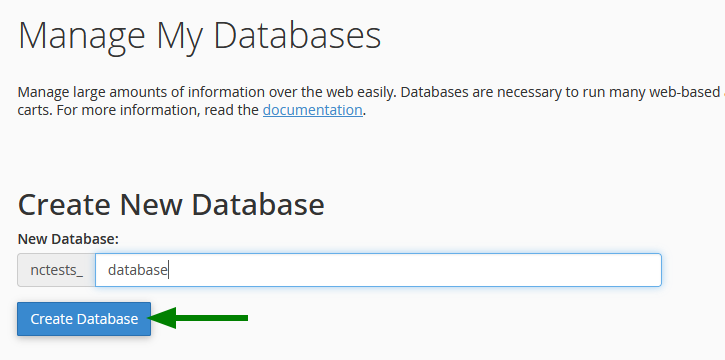
Create a Database
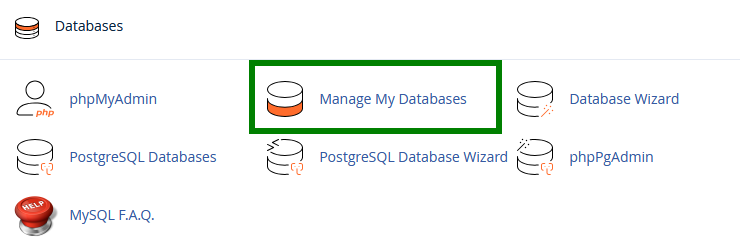
- In cPanel, click on Manage My Databases
- In the Create New Database section, enter the database name
- Click on Create Database
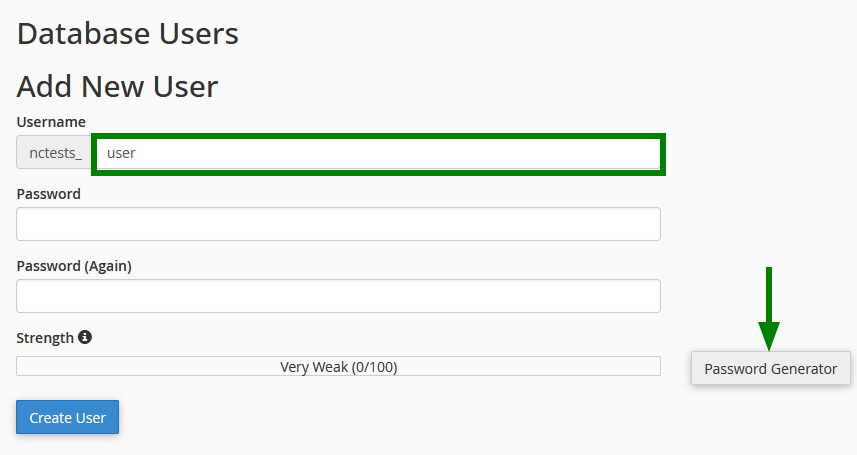
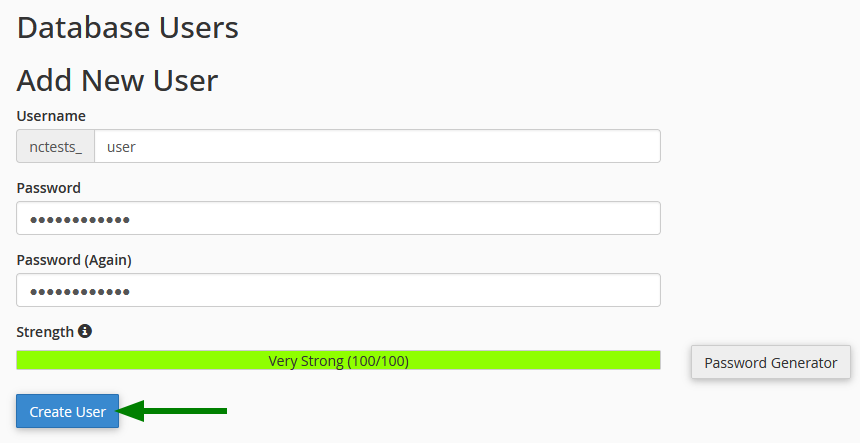
Create a MySQL User
- Scroll down to the Database Users section > Add New User
- Enter the desired username
- Create a secure password (use the generator)
- Click on Create User
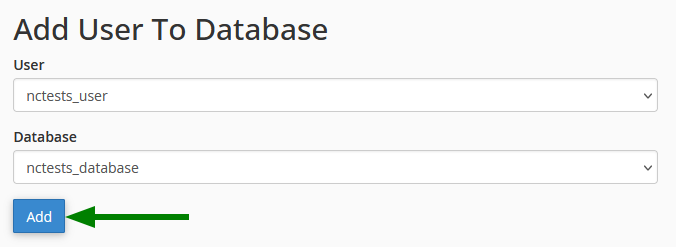
Associate User with Database
- In the Add User To Database section, select the user and database
- Click on Add
Configure Privileges
Select the appropriate privileges for the user:
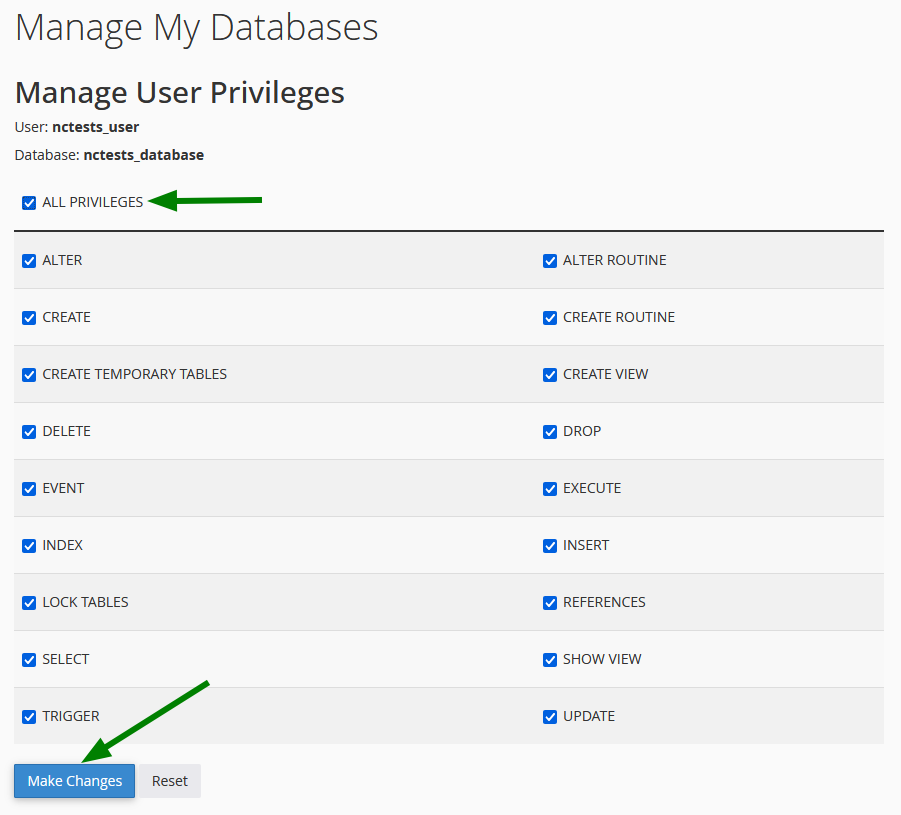
Click on Make Changes to apply.
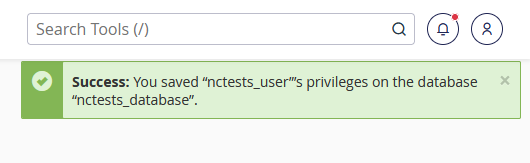
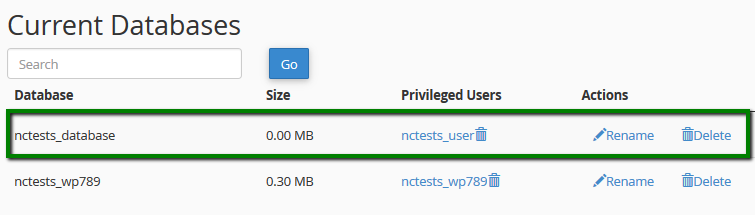
Verify Configuration
Return to Manage My Databases and check the Current Databases section to ensure everything is correctly configured:
Understanding MySQL Privileges
Privileges Table
| Privilege | Description | Recommendation |
|---|---|---|
| ALL PRIVILEGES | All rights on the database | ✅ For site owner |
| SELECT | Read data | Read-only |
| INSERT | Add data | Basic write |
| UPDATE | Modify existing data | Basic write |
| DELETE | Delete data | Basic write |
| CREATE | Create tables | Administration |
| DROP | Delete tables | ⚠️ Dangerous |
| ALTER | Modify table structure | Administration |
| INDEX | Manage indexes | Optimization |
| REFERENCES | Create foreign keys | Table relationships |
| CREATE TEMPORARY TABLES | Create temporary tables | Advanced applications |
| LOCK TABLES | Lock tables | Maintenance |
| EXECUTE | Execute stored procedures | Advanced applications |
| CREATE VIEW | Create views | Advanced applications |
| SHOW VIEW | Show views | Advanced applications |
| CREATE ROUTINE | Create procedures | Advanced applications |
| ALTER ROUTINE | Modify procedures | Advanced applications |
| EVENT | Manage events | Automation |
| TRIGGER | Manage triggers | Automation |
Recommended Configurations by Use Case
| Use Case | Recommended Privileges |
|---|---|
| WordPress / CMS | ALL PRIVILEGES |
| Read-only Application | SELECT |
| Basic CRUD Application | SELECT, INSERT, UPDATE, DELETE |
| Developer | ALL PRIVILEGES |
| Automatic Backup | SELECT, LOCK TABLES |
Managing Databases with phpMyAdmin
Accessing phpMyAdmin
In cPanel, click on phpMyAdmin in the Databases section.
phpMyAdmin Interface
The interface consists of several elements:
| Area | Description |
|---|---|
| Left Panel | List of your databases and tables |
| Main Area | Display and edit data |
| Top Bar | Tools (SQL, Import, Export, etc.) |
Common Actions in phpMyAdmin
Browsing Data
- Select a database from the left panel
- Click on a table
- Use the Browse tab to view data
Executing SQL Query
- Select the database
- Click on the SQL tab
- Enter your query and click Go
-- Example: Show all WordPress users
SELECT * FROM wp_users;

-- Example: Count posts
SELECT COUNT(*) FROM wp_posts WHERE post_type = 'post';
Importing a Database
- Select the target database
- Click on the Import tab
- Choose your
.sqlfile - Click Go
⚠️ Import Limit : The maximum import size via phpMyAdmin is usually limited. For large files, use SSH.
Exporting a Database (Backup)
- Select the database
- Click on the Export tab
- Choose the format (recommended: SQL)
- Click Go
Advanced Management
Changing a User's Password
- Access Manage My Databases
- In the Current Users section, find the user
- Click on Change Password
- Enter the new password
- Click on Change Password
⚠️ Important : Update the password in all your configuration files (wp-config.php, .env, etc.)
Renaming a Database
- Access Manage My Databases
- In Current Databases, click on Rename next to the database
- Enter the new name
- Click on Proceed
⚠️ Attention : Renaming interrupts active connections. Update your configuration files.
Deleting a Database
- Access Manage My Databases
- In Current Databases, click on Delete next to the database
- Confirm the deletion
⚠️ This action is irreversible! Always backup before deleting.
Deleting a User
- Access Manage My Databases
- In Current Users, click on Delete next to the user
- Confirm the deletion
Revoking User Privileges
- Access Manage My Databases
- In Current Databases, click on the associated user's name
- Uncheck the privileges to revoke
- Click on Make Changes
Checking and Repairing a Database
Checking Integrity
- Access Manage My Databases
- In the same section, select the database
- Click on Repair Database
- cPanel will attempt to automatically repair corrupted tables
Configure Remote Access (Remote MySQL)
By default, databases are only accessible from the server. To allow remote access:
Allow an IP Address
- In cPanel, click on Remote MySQL
- Enter the IP address to allow
- Click on Add Host
Use a Wildcard Character
To allow a range of addresses:
Format Description 192.168.1.%All IPs starting with 192.168.1 %.example.comAll subdomains of example.com ⚠️ Security: Never use
%alone (all IPs)! Always limit access to necessary IPs.
Configuration for Popular Applications
WordPress (wp-config.php)
/** Database Name */
define( 'DB_NAME', 'wordpress_prefix' );

/** MySQL User */
define( 'DB_USER', 'user_prefix' );

/** MySQL Password */
define( 'DB_PASSWORD', 'your_secure_password' );

/** MySQL Server */
define( 'DB_HOST', 'localhost' );

/** Encoding (UTF-8 recommended) */
define( 'DB_CHARSET', 'utf8mb4' );

/** Collation */
define( 'DB_COLLATE', '' );
PrestaShop (parameters.php)
'database_host' => 'localhost',
'database_port' => '',
'database_name' => 'prestashop_prefix',
'database_user' => 'user_prefix',
'database_password' => 'your_secure_password',
Laravel (.env)
DB_CONNECTION=mysql
DB_HOST=localhost
DB_PORT=3306
DB_DATABASE=laravel_prefix
DB_USERNAME=user_prefix
DB_PASSWORD=your_secure_password
PHP (PDO Connection)
<?php
$host = 'localhost';
$dbname = 'database_prefix';
$username = 'user_prefix';
$password = 'your_secure_password';

try {
    $pdo = new PDO(
        "mysql:host=$host;dbname=$dbname;charset=utf8mb4",
        $username,
        $password,
        [
            PDO::ATTR_ERRMODE => PDO::ERRMODE_EXCEPTION,
            PDO::ATTR_DEFAULT_FETCH_MODE => PDO::FETCH_ASSOC
        ]
    );
    echo "Connection successful!";
} catch (PDOException $e) {
    die("Connection error: " . $e->getMessage());
}
?>
Troubleshooting
❓ Error "Access denied for user"
Possible Causes:
- Incorrect password
- User not associated with the database
- Insufficient privileges
Solutions:
- Check the password in Manage My Databases
- Ensure the user is correctly associated with the database
- Reassign privileges
❓ Error "Unknown database"
Cause: The database name is incorrect.
Solution: Verify the complete name with the prefix (ex:
user_database).❓ Error "Too many connections"
Cause: Too many simultaneous connections to the database.
Solutions:
- Close unused connections in your code
- Use persistent connections sparingly
- Contact support to increase the limit if necessary
❓ Corrupted Database
Symptoms: Errors during queries, missing data.
Solutions:
- Use the Repair Database tool in cPanel
- In phpMyAdmin, select the tables > Repair table
- In SSH:
mysqlcheck -u user -p --repair database_name❓ Import Fails (File Too Large)
Solutions:
- Split the SQL file into multiple parts
- Use command line import (SSH):
mysql -u user -p database_name < file.sql- Compress the file to .gz before importing
Security Best Practices
🔒 Essential Recommendations
Practice Importance Use strong passwords (16+ characters) ⭐⭐⭐ Critical One user per database/application ⭐⭐⭐ Critical Grant only necessary privileges ⭐⭐ Important Regularly backup ⭐⭐⭐ Critical Avoid using "root" for applications ⭐⭐⭐ Critical Limit remote access ⭐⭐ Important 🛡️ Security Checklist
- [ ] Unique and complex password for each user
- [ ] Custom table prefix (not default
wp_) - [ ] Configured daily automatic backup
- [ ] Secure phpMyAdmin access
- [ ] No remote access unless absolutely necessary
- [ ] Limited privileges to the bare minimum
Summary
Step Action 1 Access Database Wizard or Manage My Databases 2 Create the database 3 Create the MySQL user with a strong password 4 Associate the user with the database 5 Configure appropriate privileges 6 Take note of the login information 7 Configure your application with this information 8 Test the connection