
 Client area

Difficulty: Beginner ⭐
Compatible servers: Vintage Story on OuiPanel
📋 Introduction
This guide explains how to set up your Vintage Story server in OuiPanel. You will see how to add your players to the whitelist, become an administrator, edit the serverconfig.json file, add mods from the ModDB and change version.
Your server installs itself, with no account to provide. Every player, yourself included, must still own the game with their own Vintage Story account.
⚠️ A Vintage Story dedicated server only accepts players on its whitelist. As long as you have not added anyone, the server refuses every connection: start with the section "Add your players to the whitelist".
📂 Open the server files
You have two ways to open the server files.
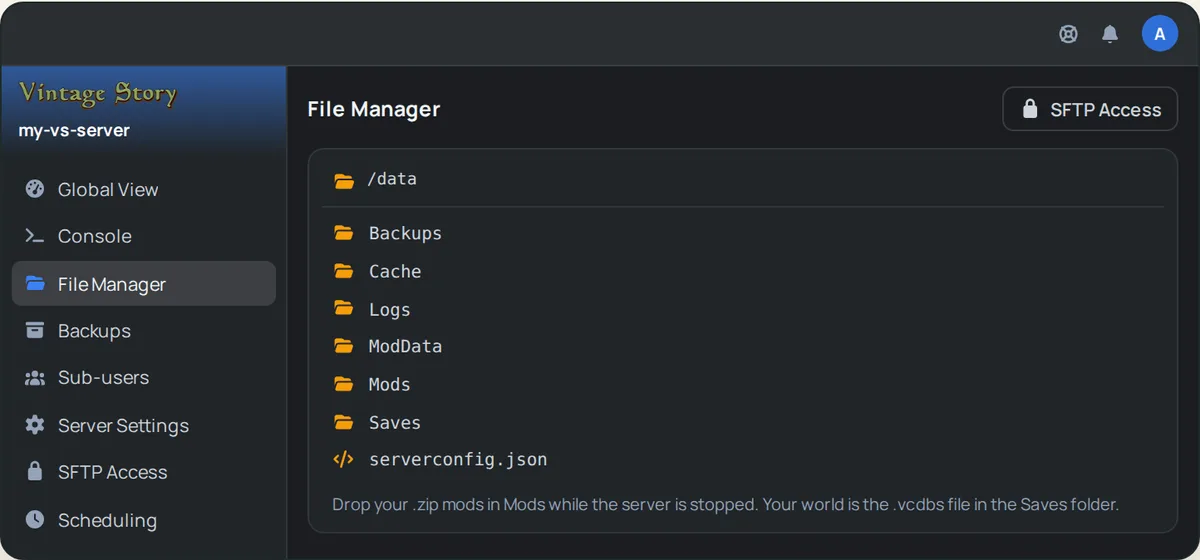
- The OuiPanel File Manager. Open your server, then click File Manager in the menu. Click a file to open it, edit it, then save.
- SFTP, with software such as FileZilla. Our guide How to connect via SFTP with FileZilla explains the connection.
Everything related to your game is in the data folder:
| Item | Content |
|---|---|
Saves | Your world, the default.vcdbs file. |
Mods | Your mods, as .zip files. |
serverconfig.json | The server settings, created at first start. |
Logs | The server logs. |
Backups, Cache, ModData | Files managed by the game. |
🔐 Add your players to the whitelist
The whitelist is the list of players allowed to join your server. It is enabled by default on a dedicated server.
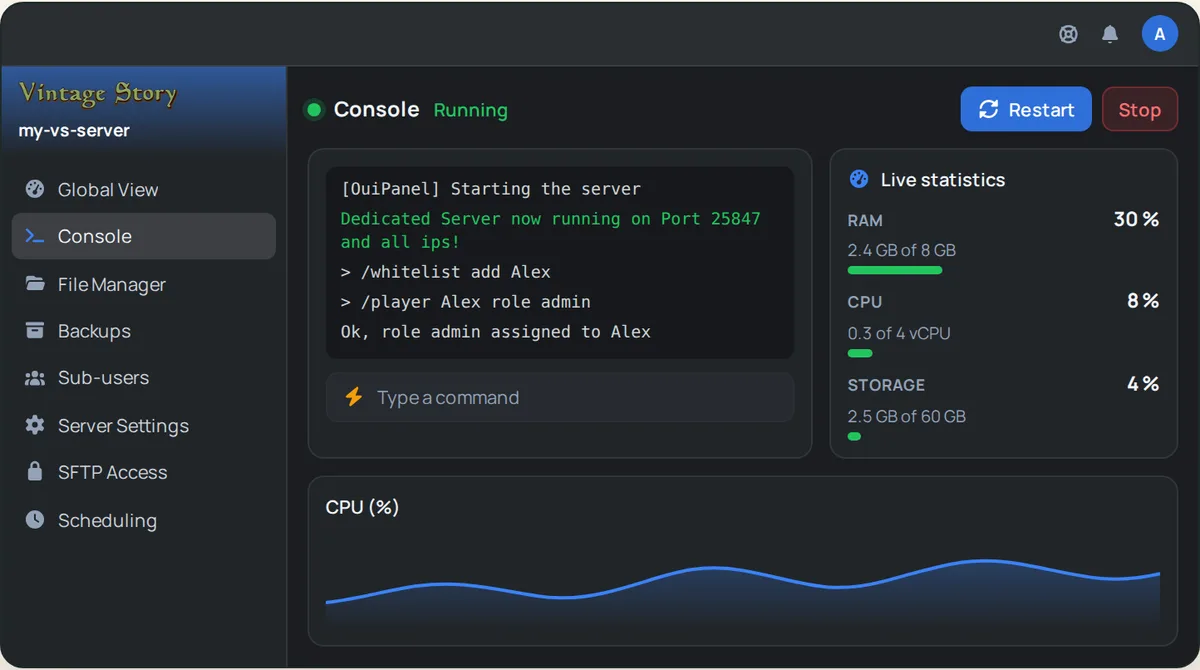
- Start the server from the OuiPanel Console and wait for the
Dedicated Server now running on Portline. - In the console command field, type
/whitelist addfollowed by the player's name, the one from their Vintage Story account, then confirm. For example:/whitelist add Alex - Repeat for each player, and do not forget yourself.
👑 Become an administrator
Roles in the game grant more or fewer rights. The default role of a new player is suplayer. The admin role grants every right.
- First add your name to the whitelist (previous section).
- In the OuiPanel console, type
/player, your name, thenrole admin. For example:/player Alex role admin - The server replies
Ok, role admin assigned to Alex. You now have every right in the game.
⚙️ Edit the serverconfig.json file
The data/serverconfig.json file holds the game settings. The server creates it at its first start.
| Key | Purpose |
|---|---|
ServerName | The server name. |
WhitelistMode | The whitelist, enabled by default on a dedicated server (0). |
AllowPvP | Combat between players, allowed by default (true). |
DefaultRoleCode | The role given to new players, suplayer by default. |
- Stop the server from the Console.
- Open
data/serverconfig.jsonin the File Manager, change the value you want, then save. - Start the server.
💡 The port and the number of players are set by OuiPanel at startup. Changing them in the file has no effect: use the variables (next section).
💡 The game sees every connection coming from the address of our server, not from each player's address. So leave the
LoginFloodProtectionandTemporaryIpBlockListkeys set tofalse, their default value: if enabled, they could block all your players at once.
The file contains other keys, described on the game's official wiki. The Password key, for example, is meant by the game to ask players for a password. Change one key at a time and keep a copy of the file first.
👥 Set the number of players
Your server accepts 16 players by default.
- In OuiPanel, go to Configuration › Server Settings.
- In the Environment Variables section, change Max Clients, then click the checkmark to the right of the field to save it.
- Restart the server from the Console.
More players need more memory. The game's developer counts 1 GB, plus 300 MB per player, and more with large mods.
🧩 Add mods from the ModDB
Vintage Story mods are downloaded from the official ModDB, mods.vintagestory.at.
- On the mod page, download the
.zipfile for the version that matches your server. - Stop the server from the Console.
- Upload the
.zipfile, without extracting it, to thedata/Modsfolder, via SFTP or in the File Manager. - Start the server.
⚠️ Mods remain unsupported by us. Make a backup before adding any, and check on the ModDB that each mod exists for your game version.
🔄 Choose the version and update
On delivery, the server installs the latest stable version of the game. It does not update itself.
- Update: when a new version is released, reinstall the server from OuiPanel. It downloads the latest stable version.
- Choose another version: in the variables, enter the version you want in Release version (for example
1.22.7), or the branch in Release branch (stableorunstable), save with the checkmark, then reinstall.
Reinstalling replaces the game files and keeps the data folder: your world, serverconfig.json and your mods.
💡 Make a backup before changing version, and check that your mods support the new version.
💾 Back up your world
In OuiPanel, the Backups page creates a backup on demand, and the Scheduling page schedules them, for example every night. A backup includes the whole server, including your world, the data/Saves/default.vcdbs file.
🎮 Join the server
- Launch Vintage Story and sign in with your account.
- Open Multiplayer, then Add New Server.
- Enter the address and port of your server, as shown in OuiPanel, then connect.
If the game refuses the connection, check that the player name is on the whitelist.
Need a Vintage Story server?
Vintage Story server hosting from $3.46/mo, with ModDB mods, the whitelist and backups included.